How to Repair Bathroom Shower Tile Grout
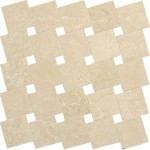
The grout between bathroom shower tiles is essential for a clean and functional shower. It prevents water from seeping into the wall, protects the tiles from becoming loose, and adds to the aesthetic appeal of the shower. Over time, grout can become stained, cracked, or chipped, making it less effective and unsightly. Thankfully, repairing bathroom shower tile grout is a relatively straightforward DIY project that can restore its functionality and appearance.
Assess the Damage
Before starting the repair process, it’s vital to assess the extent of the damage. This will help you determine the best course of action and the necessary materials.
Begin by inspecting the grout for cracks, chips, and missing sections. If the damage is minor, simple re-grouting may suffice. However, for significant damage, you might need to replace the grout entirely.
Next, check for signs of mold or mildew. These are often indicators of water damage and may require more extensive repairs.
Prepare for Repair
Once you’ve assessed the damage, gather the necessary materials. Depending on the extent of the damage, you may need the following:
*
Grout removal tool:
For removing old grout. *Grout saw:
For precise cuts around tiles. *Bucket:
For mixing grout and cleaning. *Grout float:
For applying and smoothing grout. *Grout sealant:
To waterproof and protect the grout. *Cleaning rags:
For wiping away excess grout and cleaning surfaces. *Safety gloves and mask:
For protection during the repair process. *New grout:
Choose a color that matches the existing grout or complements the bathroom decor.
Repairing the Grout
Now, let’s move on to the actual repair process.
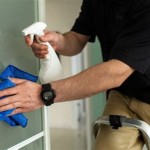
Step 1: Clean the Grout Lines
The first step is to thoroughly clean the grout lines. Start by removing any loose grout or debris with a grout removal tool or a small scraper. Then, use a grout cleaner or a mixture of baking soda and water to remove mold, mildew, and dirt. Allow the grout to dry completely before proceeding.
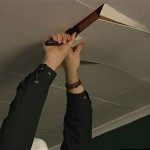
Step 2: Remove Old Grout
If the grout is severely damaged, you may need to remove it completely. Use a grout removal tool or a utility knife to carefully remove the old grout. Be careful not to damage the tiles. Work in small sections to avoid removing too much grout at once.
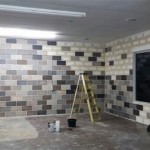
Step 3: Apply New Grout
Once the grout lines are clean and free of old grout, mix the new grout according to the manufacturer's instructions. Use a grout float to apply the grout to the lines, pressing it into the spaces between the tiles. Ensure the grout is smooth and level. Clean up any excess grout with a damp cloth.
Step 4: Allow the Grout to Cure
After applying the grout, allow it to cure for the time specified by the manufacturer. This typically takes 24 to 48 hours. During this time, avoid exposing the grout to water or excessive pressure.
Step 5: Seal the Grout
Once the grout is cured, seal it to waterproof and protect it from stains and mildew. Apply the grout sealant according to the manufacturer’s instructions. Two coats are recommended for optimal protection. Allow the sealant to dry thoroughly before using the shower.
Preventive Measures
To prevent future grout damage, follow these tips:
* Use a squeegee after each shower to remove excess water from the tile surface. * Clean the grout regularly with a grout cleaner to remove dirt and grime. * Avoid using harsh chemicals or abrasive cleaners that can damage the grout. * Consider applying a sealant to the grout every year to maintain its water resistance.

How To Prevent Expensive Bathroom Shower Tile And Grout Repair Promaster Home Handyman

Is Ed Grout A Problem Repair Easy The Medic

Quick Fix Repair Ed Bathroom Grout

How To Fix Holes In Shower Grout The Experts

How To Repair Ed Tile Grout An Easy Guide The Lived In Look

How Do I Know If Need To Regrout My Shower The Grout Medic

How To Prevent Expensive Bathroom Shower Tile And Grout Repair Promaster Home Handyman

How To Regrout Bathroom Tile In 5 Easy Steps True Value

The Definitive Grout Repair Guide 5 Steps True Value

Quick And Easy Shower Tile Grout Repair With Tips Materials Etc
Related Posts