The Definitive Guide To Installing Porcelain Tiles
Porcelain tile offers exceptional durability and aesthetic appeal, making it a popular choice for various flooring and wall applications. However, a successful porcelain tile installation requires meticulous planning and execution. This guide provides a comprehensive overview of the process, from initial preparation to final grouting, ensuring a professional and long-lasting result.
1. Surface Preparation: The Foundation of Success
Proper surface preparation is crucial for a successful porcelain tile installation. The substrate, whether concrete, plywood, or existing tile, must be clean, level, and structurally sound. Any cracks, unevenness, or loose debris can compromise the integrity of the tile installation, leading to cracking, chipping, or eventual failure.
Begin by thoroughly cleaning the substrate. Remove any existing flooring, adhesive residue, dust, or debris. For concrete surfaces, use a degreaser to eliminate any oil or grease stains. Repair any cracks or imperfections using an appropriate patching compound. For plywood subfloors, ensure they are thick enough to support the weight of the tile and have adequate bracing to prevent deflection. A layer of cement backer board is typically installed over plywood before tiling.
Leveling the substrate is equally important. Use a self-leveling compound to fill any low spots or create a smooth, even surface. This will ensure proper adhesion of the tile and prevent lippage, where tile edges are higher than adjacent tiles. Allow the leveling compound to dry completely according to the manufacturer's instructions before proceeding.
2. Planning and Layout: Precision is Key
Before laying the first tile, careful planning is essential. Dry-fitting the tiles allows for accurate measurements and ensures proper alignment. Begin by finding the center point of the room and working outward. This helps to create a balanced and visually appealing layout, particularly if cuts are required at the edges of the room.
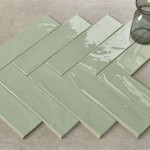
Consider the tile size and pattern when planning the layout. Larger tiles can make a room appear larger, while smaller tiles create a more intricate appearance. Staggered or brick patterns are common choices, but numerous other patterns exist. Incorporate spacing for grout lines, which are crucial for accommodating tile expansion and contraction. Grout line size typically ranges from 1/16" to 1/2", depending on the tile size and desired aesthetic.
Account for any obstacles, such as doorways, cabinets, or plumbing fixtures. Precise measurements are critical for cutting tiles accurately around these features. Specialized tile saws or wet saws are recommended for cutting porcelain tile due to its hardness.
3. Tile Installation: Achieving a Professional Finish
With the substrate prepared and the layout planned, the actual tile installation can begin. Use a high-quality thin-set mortar specifically designed for porcelain tile. Apply the mortar to the substrate using a notched trowel, ensuring even coverage and the correct notch size for the tile being used. Larger tiles generally require larger notches.
Place each tile firmly onto the mortar bed, applying even pressure to ensure full contact. Use tile spacers to maintain consistent grout lines. Periodically check for levelness and adjust as needed. Remove any excess mortar from the tile surface and grout lines immediately. Allow the thin-set to cure completely according to the manufacturer's instructions before grouting.
Cutting tiles around obstacles requires precision. Use a tile scribe or pencil to mark the cut lines. A wet saw provides the cleanest cuts for porcelain tile, minimizing chipping and ensuring accurate fitting. For intricate cuts, a tile nipper can be used to remove small pieces of tile. Always wear safety glasses when cutting tile.
4. Grouting and Sealing: The Finishing Touches
Grouting fills the spaces between the tiles, providing a water-resistant seal and enhancing the overall appearance. Choose a grout color that complements the tile. Mix the grout according to the manufacturer's instructions, ensuring a smooth, consistent paste. Apply the grout using a grout float, working it diagonally into the joints and ensuring complete filling.
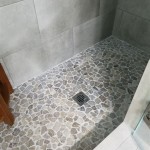
Remove excess grout from the tile surface using a damp sponge, being careful not to remove grout from the joints. Allow the grout to haze over slightly before buffing the tile surface with a clean cloth. After the grout has fully cured, apply a grout sealer to protect against staining and moisture penetration. Some porcelain tiles may also benefit from a sealant application, particularly in high-moisture areas like showers or bathrooms. Check the tile manufacturer's recommendations.
Finally, allow the sealant to dry completely before using the tiled surface. Regular cleaning and maintenance will ensure the longevity and beauty of the porcelain tile installation.

How To Install Porcelain Tiles Tile Factory Direct

How To Install Porcelain Tiles Tile Factory Direct

How To Install Porcelain Tiles Tile Factory Direct

Complete Guide On How To Install Ceramic Floor Tiles Rubi Blog Usa

Complete Guide On How To Install Ceramic Floor Tiles Rubi Blog Usa

The Must Have Guide To Porcelain Tile Flooring D R

Tile Installation A Guide For Diy Enthusiasts

A Simple Approach To Installing Ceramic Tile On Floor Apollo
.webp?strip=all "How To Install Tile Like A Pro Step By Guide Wintel Vitrified")
How To Install Tile Like A Pro Step By Guide Wintel Vitrified

Tile Installation Training The Ultimate Guide
Related Posts