How To Prep Backer Board For Tile: A Comprehensive Guide
Preparing backer board for tile is a crucial step in ensuring a durable and visually appealing tiled surface. Backer board provides a stable and waterproof base for tiles, preventing cracking and moisture damage.
Materials You'll Need:
- Backer board (cement or gypsum)
- Thin-set mortar
- Notched trowel
- Tape measure
- Utility knife or scissors
- Butt joints
- Screws or nails
- Drill or hammer
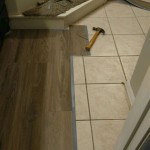
Step 1: Measure and Cut Backer Board
Measure and cut the backer board to fit the area where the tiles will be installed. Use a tape measure and utility knife or scissors to cut straight lines. Ensure the cuts are clean and precise.
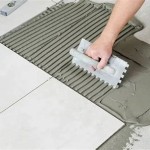
Step 2: Apply Thin-Set Mortar
Spread a thin layer of thin-set mortar onto the subfloor using a notched trowel. The notches will create a textured surface that helps the backer board adhere better.
Step 3: Place Backer Board
Carefully place the backer board onto the thin-set mortar. Press the board firmly to ensure it is completely seated. Use a level to check for flatness.
Step 4: Secure Backer Board
Secure the backer board to the subfloor using screws or nails. Drive the fasteners through the backer board and into the subfloor at regular intervals. Countersink the fasteners slightly below the surface of the board.
Step 5: Tape Joints
If there are any joints between the backer board sheets, apply mesh or paper tape over the seams. The tape will reinforce the joints and prevent moisture from penetrating.
Step 6: Install Butt Joints
Use butt joints to create smooth transitions between adjoining backer board pieces. Overlap the boards slightly and secure them with screws or nails.
Step 7: Seal Seams
Once the backer board is installed, apply a layer of thin-set mortar over the seams. Use a small trowel or brush to seal any gaps or voids.
Tips:
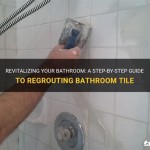
- Use a moisture-resistant backer board for wet areas like bathrooms and showers.
- Backer board should be a minimum of 1/2 inch thick.
- Allow the thin-set mortar to cure for 24 hours before tiling.
- Stagger the joints between the backer board sheets to prevent weak spots.
By following these steps, you can properly prepare backer board for tile, ensuring a stable and long-lasting tiled surface. Invest time in this preparation phase to avoid future problems and enjoy a beautiful and functional tiled floor or wall.

Easily Install Cement Board To Prep For Tile Installation

How To Install Cement Board For Tile Projects Diy Family Handyman

How To Install Cement Board On A Floor Diy Family Handyman

How To Install Goboard Tile Backer Board Diytileguy

The Best Way To Waterproof Your Shower Before Tiling Inspired Hive

The Best Way To Waterproof Your Shower Before Tiling Inspired Hive

Taping And Prepping Cement Board Joints

How To Install Cement Backer Board For Floor Tile Installation The Home Depot

Easily Install Cement Board To Prep For Tile Installation

Tiling On Wooden Floors Part 4 Overboarding Bathroom Guru
Related Posts