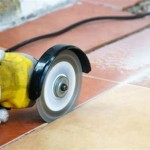
How to Install Tile on a Concrete Slab: A Comprehensive Guide
Transforming a concrete slab into a stunning tiled floor is an achievable DIY project with the right preparation and execution. This guide will provide a step-by-step overview of the essential aspects of installing tile on a concrete slab, ensuring a durable and aesthetically pleasing result.
Materials Required:
- Tiles
- Thin-set mortar
- Grout
- Tile spacers
- Notched trowel
- Grout float
- Bucket
- Mixing paddle
- Level
- Tile cutter
Preparing the Concrete Slab:
The key to a successful tile installation is a properly prepared concrete slab. Begin by cleaning the surface thoroughly with a strong cleaner to remove any dirt or debris. Inspect the slab for cracks or damage, and repair as necessary. Ensure the slab is level using a level. Any unevenness should be leveled out with a self-leveling compound.
Applying Thin-Set Mortar:
Thin-set mortar is the adhesive that bonds the tiles to the concrete slab. Using a notched trowel, spread a thin layer of thin-set mortar onto a small section of the slab, approximately 3-4 square feet. The notches will create air channels, ensuring a strong bond.
Laying the Tiles:
Carefully place the tiles onto the mortar, aligning the edges with the spacers. Use a level to ensure each tile is flat. Apply firm pressure to secure the tile. Continue this process until the entire area is covered. Allow ample time for the thin-set mortar to set, typically overnight.
Grouting:
Grouting fills the gaps between the tiles, creating a seamless and waterproof surface. Mix the grout according to the manufacturer's instructions and apply it using a grout float. Work the grout into the joints, ensuring all voids are filled. Remove any excess grout with a damp sponge.
Sealing the Grout:
Once the grout has cured, typically 24-48 hours, apply a penetrating sealer to protect it from stains and water damage. Use a brush or sponge to apply the sealer evenly over the grout lines. Allow the sealer to dry according to the manufacturer's instructions.
Finishing Touches:
Complete your tile installation by removing the tile spacers and any thin-set mortar that may have seeped out. Clean the surface thoroughly with a mild cleaner and dry completely. Your newly installed tile floor should now be ready to enjoy for years to come.
Additional Tips:
- Use a tile cutter to make precise cuts for edges or shapes.
- Start laying tiles from the center of the room to ensure even spacing.
- Allow ample time for the adhesive and grout to cure properly.
- Protect the newly installed tiles from foot traffic and moisture for at least 72 hours.
:max_bytes(150000):strip_icc()/can-you-install-tile-directly-on-concrete-1822600-04-458f7bb6c78348c1835cf8054ef36553.jpg?strip=all)
How To Install Tile Over Concrete
How To Lay Floor Tiles On Concrete Stonesuper

How To Lay A Tile Floor On Concrete Diy Homeimprovement

How To Lay Tile On Concrete With Pictures Wikihow

How To Install Ceramic Tiles On Concrete Floor Tile Installation
:max_bytes(150000):strip_icc()/can-you-install-tile-directly-on-concrete-1822600-01-8a89ceab1a274fb8ac81890ab7fc6b1b.jpg?strip=all)
How To Install Tile Over Concrete

How To Install Ceramic Tiles On Concrete Floor Tile Installation

How To Lay Tile Over Concrete

How To Lay Floor Tiles On Concrete Welcome The Rubi Tools Blog
Porcelain Tile Installation Over A Concrete Floor Like Pro Matrixgc
Related Posts


