How to Remove Tile Flooring From Concrete: A Comprehensive Guide
Removing tile flooring from concrete may seem like a daunting task, but with careful planning and the right tools, you can complete it successfully. In this comprehensive guide, we'll walk you through every essential aspect of removing tile flooring from concrete, ensuring a smooth and efficient process.
Step 1: Safety Precautions
Before starting, it's crucial to take necessary safety measures. Wear eye protection, a dust mask, and gloves. Tile removal can create dust and debris, so adequate ventilation is essential. If possible, open windows or use a fan to disperse dust.
Step 2: Protective Measures
Protect the surrounding areas from dust and falling debris. Cover furniture, baseboards, and other fixtures with plastic sheeting or drop cloths. Use masking tape to secure the coverings in place.
Step 3: Clear the Surface
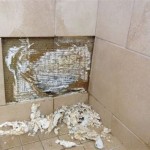
Remove any loose tiles or debris from the surface. Use a pry bar or crowbar to gently lift and remove tiles. Take care not to damage the concrete underneath.
Step 4: Establish a Starting Point
Identify a corner or an edge of the tile installation where you can start prying the tiles up. Use a sharp chisel or a masonry blade in an oscillating tool to score the grout around the starting tile.
Step 5: Pry Up the Tiles
Insert a pry bar or chisel into the scored grout and gently pry up the tile. Apply steady pressure and avoid using excessive force that could damage the concrete. Work your way around the tile, gradually loosening it from the adhesive.
Step 6: Use a Hammer and Chisel
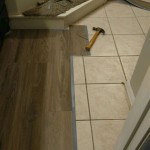
Once the tile is lifted, you may need to use a hammer and chisel to break the adhesive bond between the tile and the concrete. Place the chisel at an angle and tap it gently with a hammer to break the adhesive. Be cautious not to damage the concrete.
Step 7: Scrape the Adhesive
Use a floor scraper or a putty knife to scrape away any remaining adhesive from the concrete surface. Apply firm pressure and make sure to remove all adhesive residue to prepare the surface for new flooring.
Step 8: Clean Up and Disposal
Once all the tiles and adhesive are removed, sweep or vacuum the floor to remove dust and debris. Dispose of the tiles and adhesive properly according to local regulations.
Additional Tips:

Removing Tile And Thinset From Concrete Sawdust Girl

How To Remove Tile From A Concrete Floor

How To Remove Floor Tiles From Concrete Our Guide

How To Remove Tile Floor From Concrete

Guide How To Remove Tile From Concrete Floor Alliance Flooring Directory

The Best Way To Remove Thinset From A Cement Foundation House Of Hepworths

How To Remove Tile From Concrete Floor Central Florida Dust Free Flooring Demo Removal Llc

How To Remove Tile Diy Easy Ceramic Removal

How To Remove Tile Floor Sourgum Waste

How To Remove Old Floor Tile Adhesive All Stripped
Related Posts