A Guide To Trafficmaster Carpet Tiles Installation Instructions
Trafficmaster carpet tiles are a popular choice for commercial and residential applications. They are durable, easy to maintain, and can be installed quickly and easily. If you are planning to install Trafficmaster carpet tiles, it is important to follow the manufacturer's instructions carefully. This guide will provide you with step-by-step instructions on how to install Trafficmaster carpet tiles.
Materials You Will Need
- Trafficmaster carpet tiles
- Carpet tile adhesive
- Notched trowel
- Chalk line
- Utility knife
- Tape measure
- Safety glasses
Step 1: Prepare The Subfloor
The first step is to prepare the subfloor. The subfloor should be clean, dry, and level. If the subfloor is not level, you will need to level it using a self-leveling compound.
Step 2: Layout The Carpet Tiles
Once the subfloor is prepared, you can begin to lay out the carpet tiles. Start by finding the center of the room. Then, snap a chalk line down the center of the room. This will help you to keep the carpet tiles straight.
Once you have the chalk line, begin to lay the carpet tiles down. Start in the center of the room and work your way out. Be sure to stagger the joints between the carpet tiles.
Step 3: Apply The Carpet Tile Adhesive
Once the carpet tiles are laid out, you can begin to apply the carpet tile adhesive. Use a notched trowel to apply the adhesive to the back of the carpet tiles. Be sure to apply the adhesive evenly.
Step 4: Install The Carpet Tiles
Once the adhesive has been applied, you can begin to install the carpet tiles. Press the carpet tiles into the adhesive and smooth them out. Be sure to use a roller to press the carpet tiles into place.
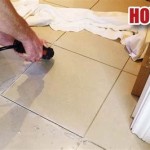
Step 5: Trim The Carpet Tiles
Once the carpet tiles are installed, you will need to trim them around the edges of the room. Use a utility knife to trim the carpet tiles. Be sure to wear safety glasses when trimming the carpet tiles.
Step 6: Clean Up
Once the carpet tiles are trimmed, you can clean up the area. Vacuum the carpet tiles and remove any excess adhesive. Your new Trafficmaster carpet tiles are now installed and ready to enjoy!
Tips
- Be sure to read the manufacturer's instructions carefully before installing Trafficmaster carpet tiles.
- Use a notched trowel to apply the carpet tile adhesive evenly.
- Press the carpet tiles into the adhesive and smooth them out. Use a roller to press the carpet tiles into place.
- Trim the carpet tiles around the edges of the room using a utility knife.
- Vacuum the carpet tiles and remove any excess adhesive.

Trafficmaster Manuals

Trafficmaster Ht044 197 1818 Mesa Boulder Texture Residential 18 In X L And Stick Carpet Tile Instructions

How To Install Carpet Tiles The Home Depot

How To Install Carpet Tiles The Home Depot

Trafficmaster Ht044 197 1818 Mesa Boulder Texture Residential 18 In X L And Stick Carpet Tile Instructions

New Flooring Made Easy With Carpet Tiles Installation Guide

Trafficmaster Charming Aluminum Gray 24 Oz Polyester Twist Installed Carpet Hdd8787501 The Home Depot

Trafficmaster Mesa Boulder Beige Residential 18 X In L And Stick Carpet Tile Square 22 5 Sq Ft Ht044 197 1818

Installing L And Stick Carpet Tiles For Beginners 6 Helpful Tips

How To Install Carpet Tiles The Home Depot
Related Posts