A Step-by-Step Guide to Regrouting Your Shower Tiles and Grout
Regrouting your shower tiles and grout can be a daunting task, but it's a necessary one to keep your shower looking its best and to prevent water damage. Here's a step-by-step guide to help you get the job done right.
Materials You'll Need
- Grout removal tool
- Grout float
- New grout
- Grout sealer
- Caulk gun
- Caulk
- Sponge
- Bucket
- Masking tape (optional)
Step 1: Prepare the Area
Start by removing any fixtures or accessories from the shower, such as showerheads, soap dishes, and towel bars. If you're regrouting a small area, you can use masking tape to protect the surrounding tiles and grout.
Step 2: Remove the Old Grout
Use a grout removal tool to carefully remove the old grout from between the tiles. Be careful not to damage the tiles themselves. If the grout is particularly stubborn, you can use a heat gun to soften it up before removing it.
Step 3: Clean the Tiles
Once the old grout is removed, use a sponge and bucket of warm water to clean the tiles. Remove any remaining dust or debris.
Step 4: Apply the New Grout
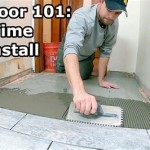
Mix the new grout according to the manufacturer's instructions. Using a grout float, apply the grout to the joints between the tiles. Press the grout firmly into the joints, and use a damp sponge to remove any excess grout from the surface of the tiles.
Step 5: Let the Grout Cure
Allow the grout to cure for the amount of time specified by the manufacturer. This will typically be around 24 hours.
Step 6: Seal the Grout
Once the grout is cured, apply a grout sealer to protect it from water damage. Use a sponge to apply the sealer, and allow it to dry according to the manufacturer's instructions.
Step 7: Caulk the Edges
Apply a bead of caulk around the edges of the shower where the tiles meet the wall or tub. Use a caulk gun to apply the caulk, and smooth it out with your finger.
Step 8: Reinstall Fixtures and Accessories
Once the caulk is dry, you can reinstall the fixtures and accessories that you removed in Step 1.
Tips for Success
- Use a small grout float for narrow joints, and a larger float for wider joints.
- Don't overmix the grout. It should be the consistency of peanut butter.
- Press the grout firmly into the joints, but be careful not to damage the tiles.
- Remove any excess grout from the surface of the tiles immediately with a damp sponge.
- Allow the grout to cure for the full amount of time specified by the manufacturer.

How To Regrout A Shower Wall Step By Guide

Revive Your Shower A Step By Guide To Regrouting Like Pro Aspen Services

A Step By Guide On How To Regrout Shower Wall

Regrout Your Tile In 10 Steps Homeadvisor

A Step By Guide On How To Regrout Bathroom Tiles Barretts Of Maynooth

How To Regrout Tiles Step By Guide

How To Regrout A Shower Wall Step By Guide

How To Regrout Bathroom Tile True Value Hardware

How To Regrout A Shower Effective Regrouting Tips 2024 Aspen Services
How To Regrout Bathroom Tiles A Complete Guide Timesproperty
Related Posts

