How to Fix Grout in Bathroom Floor Tile
A well-maintained bathroom is a sanctuary of cleanliness and comfort. Ensuring your bathroom's pristine condition includes addressing any issues with its floor tiles and grout. Loose or cracked grout can not only compromise the aesthetics of your bathroom but also create unsanitary conditions, fostering mold and bacteria growth.
Fixing grout in bathroom floor tile is a relatively straightforward task that can restore the beauty and functionality of your bathroom. Here's a comprehensive guide to help you tackle this home improvement project efficiently:
1. Assessment and Preparation
Before embarking on the repair, thoroughly examine the grout lines to identify the extent of the damage. Note any areas with missing, loose, or cracked grout. Ensure the bathroom is well-ventilated, as you will be working with chemicals.
Gather the necessary tools, including a grout saw, utility knife, grout float, grout sponge, and a bucket for mixing grout. Choose a grout color that matches or complements the existing tile. Remember to wear gloves and safety glasses for protection.
2. Removing Damaged Grout
Use a grout saw or utility knife to carefully remove the damaged or loose grout. Be precise and avoid damaging the surrounding tiles. Work in small sections, starting from one corner and gradually moving towards the center.
Once you have removed the old grout, thoroughly clean the grout lines using a damp sponge or cloth. Remove any remaining debris or dust to ensure proper adhesion of the new grout.
3. Mixing and Applying New Grout
Refer to the manufacturer's instructions to mix the grout. Use clean water and mix the grout to a thick, spreadable consistency. Avoid making it too runny, as this will weaken the bond.
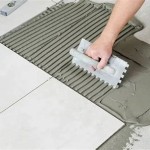
Apply the grout to the cleaned grout lines using a grout float. Hold the float at a 45-degree angle and apply firm pressure to force the grout into the gaps. Ensure the grout is level with the tiles and remove any excess.
4. Finishing Touches
After applying the grout, use a grout sponge dampened with clean water to wipe off any excess and smooth the surface. Work in small sections, rinsing and拧干 the sponge frequently.
Allow the grout to dry completely before using the bathroom. The drying time will vary depending on the type of grout and the humidity levels. Refer to the manufacturer's instructions for the recommended drying period.
Once the grout is thoroughly dry, seal it using a penetrating grout sealer. This will protect the grout from moisture, stains, and mold growth, ensuring a long-lasting and beautiful finish.
Tips for Success
* Use a color-matched grout pen to touch up small areas of damaged grout if removing damaged grout is not necessary. * If the grout is deeply cracked or damaged, you may need to replace the entire grout line. * If the tiles are also damaged, it may be necessary to replace them before re-grouting. * Allow the grout to dry completely before sealing to prevent trapping moisture underneath. * Clean the grout regularly to maintain its appearance and prevent the accumulation of dirt and grime.
How To Repair Ed Tile Grout An Easy Guide The Lived In Look

How To Prevent Expensive Bathroom Shower Tile And Grout Repair Promaster Home Handyman

Fix Ed Missing Tile Grout In A Few Easy Steps Hometalk

Is Ed Grout A Problem Repair Easy The Medic

Ed Or Broken Grout Signals A Bigger Problem The Experts

How To Fix Holes In Shower Grout The Experts

How To Repair Ed Tile Grout An Easy Guide The Lived In Look

How To Repair Ed Tile Grout An Easy Guide The Lived In Look

How To Fix Ed Grout In Tile Floor Repair Tips

Ed Grout Causes Repair Replacement Homeadvisor
Related Posts

