Transform Your Shower With Floor Tiles: A Step-By-Step Guide
Transforming your shower with floor tiles is a relatively straightforward and affordable project that can instantly upgrade the look and functionality of your bathroom. Here's a step-by-step guide to help you get started:
1. Preparation and Planning
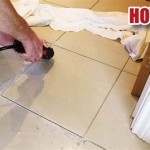
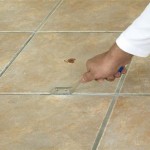
To prepare your shower for tiling, start by removing the old flooring, fixtures, and any leftover adhesive. Next, clean the surface thoroughly and ensure it is level by using a spirit level. Plan the layout of your tiles, ensuring they are evenly spaced and aligned.
2. Choose the Right Tiles
When selecting shower floor tiles, opt for non-slip materials such as porcelain, ceramic, or natural stone. Consider the size, shape, and color of the tiles to complement your bathroom's overall design.
3. Set the Base
Before laying the tiles, apply a layer of thinset mortar to the shower floor using a notched trowel. This adhesive will help bond the tiles to the surface. Use a level to ensure the mortar is applied evenly and remove any excess.
4. Lay the Tiles
Starting from the center of the shower, carefully place the tiles onto the mortar bed. Press them down firmly and use spacers to maintain consistent gaps between tiles. Check for level and align as you proceed, using a rubber mallet to adjust.
5. Grouting
Once the tiles are set, fill the gaps between them with grout using a rubber float. Match the grout color to the tiles or choose a contrasting shade to create a striking look. Allow the grout to set according to the manufacturer's instructions.
6. Sealing
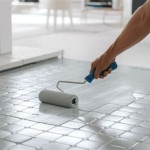
To protect the tiles and grout from moisture, apply a sealant after the grout has fully cured. Use a brush or sponge to evenly coat the surface, ensuring it penetrates the pores of the tiles and grout. Allow the sealant to dry completely.
7. Finishing Touches
Reinstall the shower fixtures and make any necessary plumbing adjustments. Consider adding a shower curtain or glass enclosure for added privacy and functionality. Clean the shower thoroughly to remove any remaining debris or grout residue.
Additional Tips:
- Use a waterproof membrane beneath the tiles to prevent water damage.
- Slope the floor slightly towards the drain to ensure proper drainage.
- Test the tiles for slip resistance before grouting to avoid accidents.
- Regularly clean and seal the tiles to maintain their appearance and longevity.
Benefits of Tiled Shower Floors:
- Improved aesthetics and design options
- Increased durability and longevity
- Enhanced slip resistance and safety
- Hygienic and easy to clean
- Increased property value

40 Bathroom Floor Tiles That Will Make You Love Your Again

40 Free Shower Tile Ideas Tips For Choosing Why

Ceramic Tile Shower Ideas Trendy To Use In 2024

40 Bathroom Floor Tiles That Will Make You Love Your Again
:max_bytes(150000):strip_icc()/walk-in-shower-ideas-Garza_Dec2023_0859_Final2-17a94cf445c543219be065fdb7d273fe.jpg?strip=all)
17 Luxurious Walk In Shower Ideas From Designers

71 Bathroom Tile Ideas To Transform Your Space

How To Transform Your Bathroom With A Curbless Shower Rtf Rethinking The Future

Shower Tiles Bathroom Tile Ideas Westside Stone
.jpg?strip=all)
36 Refreshing Shower Tile Ideas To Make Over Your Bathroom Architectural Digest

40 Bathroom Floor Tiles That Will Make You Love Your Again
Related Posts


