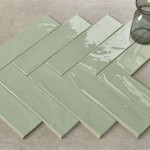
Everything You Need To Know About Installing Tiles
Installing tiles is a popular way to add beauty and functionality to your home. Whether you are tiling a backsplash, bathroom, or floor, it is important to do it correctly to ensure a long-lasting and beautiful installation. This guide will provide you with everything you need to know about installing tiles, from choosing the right materials to grouting and sealing.
Choosing the Right Materials
The first step in installing tiles is choosing the right materials. There are many different types of tiles available, including ceramic, porcelain, glass, and natural stone. Each type of tile has its own unique advantages and disadvantages, so it is important to choose the one that is best suited for your needs.
- Ceramic tiles are a popular choice for both indoor and outdoor applications. They are relatively inexpensive, durable, and easy to clean.
- Porcelain tiles are similar to ceramic tiles, but they are denser and more durable. They are also less likely to absorb water, making them a good choice for areas with high moisture.
- Glass tiles are a beautiful and versatile option for both indoor and outdoor applications. They are available in a wide range of colors and styles, and they can be used to create stunning mosaics.
- Natural stone tiles are made from natural materials such as marble, granite, and slate. They are a beautiful and durable option, but they can be more expensive than other types of tiles.
Preparing the Surface
Once you have chosen the right tiles, you need to prepare the surface before you begin installing them. The surface should be clean, level, and dry. You may need to remove old tiles, level the surface with a self-leveling compound, or repair any cracks or holes.
If you are installing tiles on a concrete floor, you will need to apply a moisture barrier to prevent moisture from seeping through the tiles.
Installing the Tiles
Once the surface is prepared, you can begin installing the tiles. The first step is to lay out the tiles on the surface to ensure that they fit properly. You may need to cut some of the tiles to fit around obstacles, such as toilets or cabinets.
Once the tiles are laid out, you can begin applying the thin-set mortar. Thin-set mortar is a type of adhesive that is used to hold the tiles in place.
Use a notched trowel to apply the thin-set mortar to the surface. The notches in the trowel will help to create a strong bond between the tiles and the surface.
Press the tiles into the thin-set mortar, making sure that they are level and aligned. Use a rubber mallet to tap the tiles into place.
Once the tiles are installed, you need to let them dry for at least 24 hours.
Grouting the Tiles
Once the tiles are dry, you can grout them. Grout is a type of filler that is used to fill the joints between the tiles.
To grout the tiles, you will need to mix the grout according to the manufacturer's instructions. Once the grout is mixed, you can apply it to the joints between the tiles using a grout float.
Use a grout float to press the grout into the joints between the tiles. Once the joints are filled, you can smooth the grout with a damp sponge.
Let the grout dry for at least 24 hours.
Sealing the Tiles
Once the grout is dry, you can seal the tiles. Sealer is a type of coating that is used to protect the tiles from moisture and stains.
To seal the tiles, you will need to apply the sealer according to the manufacturer's instructions. Once the sealer is applied, you can let it dry for at least 24 hours.
Maintaining Your Tile Installation
Once your tile installation is complete, it is important to maintain it properly to ensure that it lasts for many years to come. Here are a few tips for maintaining your tile installation:
- Clean your tiles regularly. Use a mild cleaner and a soft cloth to clean your tiles. Avoid using harsh cleaners or abrasive materials, as these can damage the tiles.
- Seal your tiles periodically. Sealer helps to protect the tiles from moisture and stains. Reapply the sealer according to the manufacturer's instructions.
- Repair any damaged tiles promptly. If a tile is damaged, it is important to repair it promptly to prevent further damage to the installation.
By following these tips, you can ensure that your tile installation will last for many years to come.

Complete Guide On How To Install Ceramic Floor Tiles Rubi Blog Usa

Everything You Should To Know About Tiles Installation

How To Install Wall Tiles Important Tips Ultratech Cement

All About Tile Installation Its Precautions

How To Install A Tile Floor The Home Depot

Complete Guide On How To Install Ceramic Floor Tiles Rubi Blog Usa

How To Install Wall Tiles Important Tips Ultratech Cement

Everything You Need To Know Before Installing 12x24 Tile The Creek Line House

6 Tips For Laying Floor Tile With No Experience

How To Install A Tile Floor The Home Depot
Related Posts


