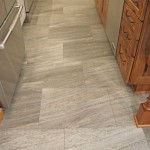
Grouting Your Tile Floor for a Cleaner Look
Grouting is an essential part of tiling and can significantly impact the overall look of your floor. Properly grouted tiles will create a seamless and polished appearance, while poorly grouted tiles can make your floor look messy and unkempt.
If you're planning to grout your tile floor, it's important to do it correctly. Here are some tips to help you achieve a professional-looking finish:
1. Choose the Right Grout
There are many different types of grout available, so it's important to choose one that's right for your tile and the look you want to achieve. Some popular types of grout include:
- Sanded grout: This type of grout is made with sand, which gives it a rougher texture. It's best suited for larger tiles and areas with heavy traffic.
- Unsanded grout: This type of grout does not contain sand and has a smoother texture. It's ideal for smaller tiles and areas with less traffic.
- Epoxy grout: This type of grout is made with epoxy resin, which makes it very strong and durable. It's a good choice for areas that are prone to staining or moisture.
2. Prepare the Tile Surface
Before you start grouting, it's important to prepare the tile surface by removing any dirt or debris. You can do this by sweeping or vacuuming the floor and then wiping it down with a damp cloth.
3. Mix the Grout
Follow the manufacturer's instructions for mixing the grout. It's important to get the consistency right—too thick and it will be difficult to apply, too thin and it won't hold up well. You should aim for a consistency similar to peanut butter.
4. Apply the Grout
Use a grout float to apply the grout to the tile surface. Work in small sections and apply the grout evenly, filling in all the joints between the tiles. Push the grout into the joints with firm pressure.
5. Remove Excess Grout
Once you've applied the grout, you'll need to remove any excess. You can do this by using a damp sponge or cloth. Wipe the sponge or cloth over the tile surface, removing any excess grout that remains on the surface of the tiles.
6. Allow the Grout to Dry
Allow the grout to dry completely before walking on the floor or cleaning it. The drying time will vary depending on the type of grout you used and the temperature and humidity of the room. In general, you should allow the grout to dry for at least 24 hours before walking on it.
7. Seal the Grout
Once the grout is dry, you can seal it to protect it from stains and moisture. There are many different types of grout sealers available, so be sure to choose one that's compatible with the type of grout you used. Apply the sealer according to the manufacturer's instructions, usually by brushing or rolling it onto the grout.
Grouting a tile floor is a relatively easy task that can significantly improve the look of your floor. By following these tips, you can achieve a professional-looking finish that will last for years to come.

How To Clean Grout Tile Cleaning Tips Simply Spotless

How To Make Dirty Grout Look New Wildfire Interiors

How We Got Our Stained Grout White Again Young House Love

The Best Way To Clean Tile And Grout Maintenance Tips Episode 1

How To Clean Tile Floors The Home Depot

Before And After Tile Grout Sir

How To Deep Clean A Tile Floor Maid Sailors

How We Got Our Stained Grout White Again Young House Love

How To Effectively Clean Grout In Tile Flooring Guide

Before And After Tile Grout Sir
Related Posts


