A Comprehensive Guide to How To Install Slate Tile On Walls Revit
Slate tile is a beautiful and durable material that can add a touch of elegance to any wall. It is a popular choice for both indoor and outdoor applications, and it is relatively easy to install. However, there are a few things you need to know in order to get the best results.
In this article, we will provide you with a step-by-step guide on how to install slate tile on walls Revit. We will cover everything from preparing the surface to grouting the tiles. So, whether you are a professional contractor or a do-it-yourselfer, this guide will help you get the job done right.
Step 1: Prepare the Surface
The first step is to prepare the surface for the tile. This means removing any existing tile or wallpaper, and making sure that the surface is clean, smooth, and level. If the surface is not level, you will need to use a leveler to smooth it out.
Step 2: Apply Thin-set Mortar
Once the surface is prepared, you can begin applying thin-set mortar. Thin-set mortar is a type of adhesive that is used to bond the tile to the wall. Apply the thin-set mortar to the wall using a notched trowel. Be sure to follow the manufacturer's instructions for mixing and applying the thin-set mortar.
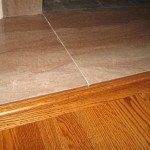
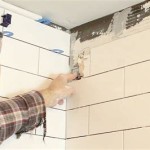
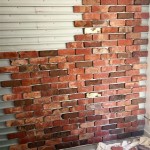
Step 3: Install the Tile
Once the thin-set mortar has been applied, you can begin installing the tile. Start by placing the tile in the corner of the wall and working your way out. Use a level to make sure that each tile is level. As you install the tile, be sure to press it firmly into the thin-set mortar.
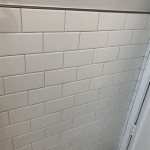
Step 4: Grout the Tile
Once the tile has been installed, you can grout the tile. Grout is a type of material that is used to fill the gaps between the tiles. Apply the grout to the tile using a grout float. Be sure to follow the manufacturer's instructions for mixing and applying the grout.
Step 5: Seal the Tile
Once the grout has dried, you can seal the tile. Sealing the tile will help to protect it from water and stains. Apply the sealer to the tile using a sponge or a brush. Be sure to follow the manufacturer's instructions for applying the sealer.
Tips for Installing Slate Tile on Walls Revit
Here are a few tips for installing slate tile on walls Revit:
- Use a level to make sure that each tile is level.
- Press the tile firmly into the thin-set mortar.
- Allow the thin-set mortar to dry completely before grouting the tile.
- Follow the manufacturer's instructions for mixing and applying the thin-set mortar and grout.
- Seal the tile to protect it from water and stains.

How To Do Wall Tiling In Revit Using The Paint Command

How To Do Wall Tiling In Revit Using The Paint Command

Tiles Modeling In Revit

Wall Pattern Tile In Interior Elevation How To Get It Show Properly Autodesk Community Revit S

Learn How To Make A Realistic Wall Tile In Revit 3d

Revit Tutorial 2025 Realistic Custom Wall Tile Material Rendering In

Solved Material Render Appearance Issue Autodesk Community Revit S

How To Create Bathroom Floor And Wall Tiles In Revit Autodesk Community S

Creating Floor Tiles And Wall In Revit Tutorials Modeling

Toilet Wall Tiles Autodesk Community Revit S
Related Posts