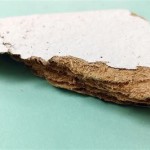
How to Replace Ceiling Tiles in a Mobile Home
Ceiling tiles are an important part of a mobile home's interior design. They can help to insulate the home, reduce noise, and improve the overall appearance of the space. However, over time, ceiling tiles can become damaged or stained, and they may need to be replaced.
Replacing ceiling tiles in a mobile home is a relatively simple task that can be completed in a few hours. By following these step-by-step instructions, you can easily replace your old ceiling tiles with new ones and give your mobile home a fresh, updated look.
Materials You'll Need
- New ceiling tiles
- Measuring tape
- Utility knife
- Caulk gun
- Caulk
Step 1: Measure and Cut the New Tiles
The first step is to measure and cut the new ceiling tiles to the correct size. To do this, you will need to measure the length and width of the space where you will be installing the tiles. Once you have these measurements, you can cut the tiles to size using a utility knife.
Step 2: Remove the Old Tiles
Once you have cut the new tiles to size, you can begin removing the old tiles. To do this, simply lift up the old tile and pull it out of place. Be careful not to damage the ceiling or the walls when removing the old tiles.
Step 3: Clean the Ceiling
Once the old tiles have been removed, you should clean the ceiling. This will help to remove any dust or debris that may have accumulated on the ceiling. You can use a damp cloth or a vacuum cleaner to clean the ceiling.
Step 4: Apply Caulk
Before you install the new tiles, you will need to apply a bead of caulk around the perimeter of the ceiling. This will help to seal the tiles and prevent air from leaking in or out. You can use a caulk gun to apply the caulk.
Step 5: Install the New Tiles
Once the caulk has been applied, you can begin installing the new ceiling tiles. To do this, simply align the tiles with the perimeter of the ceiling and press them into place. Be sure to press firmly on the tiles to ensure that they are securely in place.
Step 6: Trim the Excess Caulk
Once all of the tiles have been installed, you can trim the excess caulk around the perimeter of the ceiling. You can use a utility knife to trim the caulk. Be careful not to cut the caulk too close to the tiles, as this could damage the tiles.
Step 7: Enjoy Your New Ceiling
Once you have trimmed the caulk, your new ceiling is complete. You can now enjoy the updated look of your mobile home and the benefits that new ceiling tiles can provide.

How Can You Fix A Mobile Home Ceiling Hometalk

Mobile Home Ceiling Panels Replacement Repair Or Rebuild

Mobile Home Ceiling Panels Replacement Repair Or Rebuild

How To Repair And Replace Ceiling Panels For Mobile Homes The Home Dealer

How Do I Repair Mobile Home Ceiling Hometalk

Mobile Home Ceiling Panels Replacement Repair Or Rebuild

Painting Our Stained Mobile Home Ceilings Finally

How To Paint Mobile Home Ceilings And Cover Water Stains For Good Living

Mobile Home Ceiling Panels Replacement Repair Or Rebuild

Mobile Home Ceilings Guide Gypsum Ceiling Panels
Related Posts


