How To Change Basement Ceiling Tiles
Basement ceiling tiles are a great way to finish a basement ceiling and provide a clean, finished look. They are also relatively easy to install and can be done by most do-it-yourselfers. Here are the steps on how to change basement ceiling tiles:
1. Gather your materials. You will need the following materials to change basement ceiling tiles:
- New ceiling tiles
- Utility knife
- Caulk gun
- Caulk
- Putty knife
- Measuring tape
- Level
2. Prepare the ceiling. Before you start installing the new ceiling tiles, you need to prepare the ceiling. This involves removing any old ceiling tiles, cleaning the ceiling, and repairing any damage.
To remove the old ceiling tiles, use a utility knife to cut around the edges of the tile. Be careful not to damage the ceiling. Once the tile is cut, you can pull it down. Continue removing the old ceiling tiles until the entire ceiling is clear.
Once the old ceiling tiles are removed, clean the ceiling with a damp cloth. Remove any dust or debris that may be on the ceiling. Once the ceiling is clean, inspect it for any damage. If there is any damage, repair it before installing the new ceiling tiles.
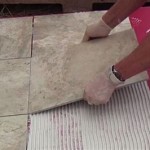
3. Install the new ceiling tiles. Once the ceiling is prepared, you can start installing the new ceiling tiles. Start by measuring the ceiling and cutting the tiles to the appropriate size. Be sure to cut the tiles so that they fit snugly against each other.
Once the tiles are cut, apply a bead of caulk to the edges of the tile. This will help to seal the tiles and prevent air from leaking through. Place the tile on the ceiling and press it into place. Use a level to make sure that the tile is level. Continue installing the ceiling tiles until the entire ceiling is covered.
4. Finish the ceiling. Once the ceiling tiles are installed, you can finish the ceiling by caulking the seams between the tiles. Apply a bead of caulk to the seam and smooth it out with a putty knife. This will help to seal the seams and give the ceiling a finished look.

Diy How To Update Old Ceiling Tile Pink Little Notebookpink Notebook

How To Replace A Drop Ceiling The Lilypad Cottage

Diy How To Update Old Ceiling Tile Pink Little Notebookpink Notebook
Diy Ceiling Tiles Replace Damaged Project Arrow Fastener

Ceiling Tile Installation Comparing Your Options Ceilings Armstrong Residential

Drop Ceiling Update Ceilings Armstrong Residential

How To Install A Drop Ceiling 14 Steps With Pictures Wikihow

Basement Ceiling Ideas Installation

Completely Cover A Drop Ceiling Ceilings Armstrong Residential

How To Easily Update An Ugly Drop Ceiling
Related Posts