Can You Lay Laminate Over Floor Tiles? A Comprehensive Guide
Laminate flooring is a popular choice for homeowners seeking an affordable and aesthetically pleasing alternative to hardwood or stone. Its ease of installation is a significant draw, leading many to consider laying it over existing flooring. A common question that arises during renovation planning is whether laminate can be installed directly over existing floor tiles. The answer, while generally affirmative, is nuanced and dependent on several factors. Understanding these factors is crucial for ensuring a successful and long-lasting laminate flooring installation.
Successfully installing laminate over tile requires careful preparation and consideration of the existing tile's condition, the subfloor structure, and the specific requirements of the laminate flooring product. Ignoring these critical aspects can lead to issues such as uneven flooring, squeaking, moisture problems, and ultimately, a premature failure of the laminate installation. This article provides a comprehensive overview of the key considerations and steps involved in laying laminate flooring over existing floor tiles.
Evaluating the Existing Tile Floor
The first and most critical step is a thorough assessment of the existing tile floor. This evaluation will determine whether the tile provides a suitable base for laminate installation. The primary focus should be on the tile's condition, evenness, and structural integrity.
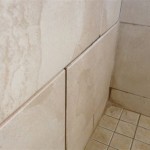
Tile Condition: Examine the tiles for cracks, chips, or loose grout. Any damaged tiles should be repaired or replaced before proceeding. Cracks can propagate through the laminate layer, creating visual imperfections and potentially compromising the floor's structural integrity. Loose grout indicates underlying movement, which needs to be addressed. Small chips can be filled with appropriate epoxy fillers designed for tile repair. Larger cracks or extensive damage will necessitate tile replacement. Ensure the replacement tiles are of the same thickness as the existing tiles to maintain a level surface.
Evenness: Using a long level, check the tile floor for any significant variations in height. Minor imperfections are often acceptable, but larger inconsistencies, such as raised or sunken tiles, must be addressed. Deviations exceeding 3/16 inch over a 10-foot span require leveling. Self-leveling compound can be used to create a perfectly flat surface. Follow the manufacturer’s instructions carefully when applying self-leveling compound, paying attention to mixing ratios, drying times, and minimum and maximum application thicknesses. Applying the compound in multiple thin layers, rather than one thick layer, can help prevent cracking and ensure a more even finish.
Structural Integrity: Assess the tile floor's stability. Loose tiles are a major concern and must be addressed. Walking across the floor, listen for any hollow sounds, which indicate that the tiles are not properly adhered to the subfloor. Loose tiles must be removed and re-set using appropriate thin-set mortar. Ensure the mortar is fully cured before proceeding with the laminate installation. Ignoring loose tiles can lead to excessive movement and eventual damage to the laminate flooring.
Moisture Levels: Testing for moisture is crucial, especially in basements or areas prone to dampness. High moisture levels trapped beneath the laminate can lead to mold growth and damage to both the laminate and the subfloor. Use a moisture meter to measure the moisture content of the tile and the subfloor beneath. If moisture levels are elevated, identify and address the source of the moisture before proceeding. Installing a vapor barrier is essential in areas with potential moisture issues.
If the existing tile floor fails to meet these criteria, it may be necessary to remove the tile entirely and prepare the subfloor according to laminate flooring manufacturer's recommendations. This is a more labor-intensive option, but it ensures a solid and stable foundation for the new flooring.
Preparing the Tile Surface for Laminate
Once the tile floor has been assessed and any necessary repairs completed, the next step is to prepare the surface for the laminate installation. This involves cleaning, leveling, and potentially installing an underlayment.
Cleaning: Thoroughly clean the tile floor to remove any dirt, dust, grease, or debris. Use a mild detergent and water, followed by a thorough rinsing. Ensure the floor is completely dry before proceeding. Residual dirt or grease can interfere with the adhesion of underlayment or vapor barriers. Avoid using harsh chemicals or abrasive cleaners, as these can damage the tile surface and potentially affect the laminate installation.
Leveling Minor Imperfections: For minor imperfections, such as slightly uneven grout lines, consider using a floor leveling compound specifically designed for filling small gaps and imperfections. Apply the compound according to the manufacturer's instructions, ensuring it is properly cured before proceeding. This will create a smoother surface and prevent the laminate from conforming to minor irregularities in the tile floor.
Underlayment Installation: An underlayment is crucial when installing laminate over tile. It provides cushioning, reduces noise transmission, and acts as a moisture barrier. Select an underlayment specifically designed for use over hard surfaces, such as tile or concrete. The underlayment should be of sufficient thickness to provide adequate cushioning and noise reduction. Install the underlayment according to the manufacturer's instructions, ensuring it is properly sealed at the seams to prevent moisture penetration. Some laminate flooring products come with a pre-attached underlayment, which can simplify the installation process. However, even with a pre-attached underlayment, an additional vapor barrier may still be necessary in areas with potential moisture concerns.
Vapor Barrier: A vapor barrier is essential if there is any risk of moisture coming up through the subfloor. This is particularly important in basements or on concrete slabs. The vapor barrier should be installed beneath the underlayment, covering the entire tile surface. Overlap the seams of the vapor barrier and tape them securely to prevent moisture from seeping through. The vapor barrier should extend slightly up the walls to create a waterproof seal. Using a high-quality vapor barrier is crucial for preventing moisture-related problems with the laminate flooring.
Properly preparing the tile surface is paramount to a successful laminate installation. Taking the time to clean, level, and install an appropriate underlayment and vapor barrier will ensure a durable, comfortable, and long-lasting floor.
Key Considerations and Potential Problems
While laying laminate over tile is a viable option, there are several key considerations and potential problems that homeowners should be aware of before proceeding.
Door Clearances: Installing laminate over tile will raise the floor height. This can create issues with door clearances, particularly in older homes where doorframes may already be close to the existing floor. Measure the existing door clearances carefully before beginning the installation. If necessary, trim the bottom of the doors to ensure they can swing freely without rubbing against the new flooring. Consider using a power planer or a circular saw with a guide to trim the doors evenly and accurately. Failure to address door clearances can result in doors that are difficult to open or close, and can also damage the laminate flooring.
Subfloor Deflection: Subfloor deflection refers to the amount of flex or movement in the subfloor under load. Excessive deflection can cause the laminate flooring to buckle, crack, or separate at the seams. If the existing tile floor has noticeable deflection, it may be necessary to reinforce the subfloor before installing the laminate. This can involve adding additional joists or installing a thicker subfloor layer. Consult with a qualified flooring professional to assess the subfloor deflection and recommend appropriate solutions. Ignoring subfloor deflection can lead to premature failure of the laminate flooring and costly repairs.
Moisture Management: As previously mentioned, moisture is a significant concern when installing laminate over tile. Even with a vapor barrier, it is crucial to ensure that the area is properly ventilated and that any potential sources of moisture are addressed. Avoid installing laminate in areas with high humidity or where spills are common, such as bathrooms or laundry rooms, unless specifically designed for such applications. Regularly inspect the laminate flooring for any signs of moisture damage, such as swelling or discoloration. Promptly address any leaks or spills to prevent further damage. Proper moisture management is essential for extending the lifespan of the laminate flooring and preventing costly repairs.
Expansion and Contraction: Laminate flooring expands and contracts with changes in temperature and humidity. It is essential to leave an expansion gap around the perimeter of the room and around any fixed objects, such as pipes or doorframes. This gap allows the laminate to expand and contract without putting pressure on the surrounding walls or objects. The size of the expansion gap will vary depending on the size of the room and the manufacturer's recommendations. Typically, a gap of ¼ to ⅜ inch is sufficient. Install baseboards or quarter-round molding to cover the expansion gap and create a finished look. Failure to leave an adequate expansion gap can lead to buckling or warping of the laminate flooring.
Transition Strips: When transitioning between different types of flooring, such as from laminate to carpet or tile, use transition strips to create a smooth and seamless transition. Transition strips also help to protect the edges of the laminate flooring and prevent tripping hazards. Choose transition strips that are specifically designed for use with laminate flooring and that match the color and style of the flooring. Install the transition strips according to the manufacturer's instructions, ensuring they are securely attached to the subfloor. Proper use of transition strips enhances the overall appearance of the flooring and improves safety.
By carefully considering these potential problems and taking appropriate precautions, homeowners can minimize the risks associated with laying laminate over tile and ensure a beautiful and long-lasting flooring installation.
Ultimately, the decision to install laminate over existing floor tiles requires a thorough assessment of the individual situation and a careful consideration of the factors outlined above. When in doubt, consult with a qualified flooring professional to obtain expert advice and ensure a successful installation.

Installing Laminate Tile Over Ceramic Diy Floors Wonderhowto

Flooring Install Tiles On Top Of Laminate Floor In Kitchen Home Improvement Stack Exchange

Can You Put Laminate Flooring Over Tile Twenty Oak

Can You Put Laminate Flooring Over Tile Alliance Directory

Quick Guide To Laying Hybrid And Other Hard Flooring Over A Tile Floor

Install Laminate Flooring Over Ceramic Tile

Installing Laminate Tile Over Ceramic Diy Floors Wonderhowto

Can Laminate Flooring Be Laid Over Tiles

Can You Put Laminate Or Vinyl Plank Flooring Over Tile

Can Timber Flooring Be Laid Over Tiles Cb Floors
Related Posts


