How to Replace Shower Floor Tile Grout
Replacing shower floor tile grout is a common home maintenance task that can significantly improve the appearance and functionality of a bathroom. Over time, grout can crack, crumble, discolor, and become a breeding ground for mold and mildew. Addressing these issues promptly not only enhances the aesthetic appeal of the shower but also prevents potential water damage to the subfloor and surrounding structures. This article provides a comprehensive guide on how to replace shower floor tile grout effectively.
Assessing the Condition of the Existing Grout and Gathering Necessary Materials
Before embarking on the grout replacement process, a thorough assessment of the existing grout is crucial. This involves identifying areas where the grout is cracked, crumbling, discolored, or showing signs of mold or mildew growth. The extent of the damage will dictate the scope of the project and the amount of materials required. A small area with minimal damage might only require spot repair, while widespread damage necessitates a complete grout replacement.
Once the condition of the grout has been assessed, the next step is to gather the necessary materials and tools. This includes:
*Grout Removal Tool:
Several options are available, including grout saws, oscillating multi-tools with grout removal attachments, and manual grout scrapers. The choice depends on personal preference and the nature of the grout being removed. Diamond-tipped grout saws are generally more effective on harder grouts like epoxy grout. *Shop Vacuum:
Essential for removing dust and debris generated during the grout removal process. *Utility Knife:
Useful for scoring along the edges of the tile to prevent chipping during grout removal. *Grout Sponge:
Used for cleaning the tile surface after applying the new grout. *Mixing Bucket:
For mixing the new grout, if using a powdered grout. *Grout Float:
A rubber or plastic tool used to apply and pack the new grout into the tile joints. *Clean Water:
For mixing and cleaning. *Grout Sealer:
To protect the newly installed grout from water damage and staining. *Safety Glasses:
To protect the eyes from grout dust and debris. *Gloves:
To protect the hands from irritation caused by grout. *Mask:
To prevent inhalation of grout dust. *Small Brush:
For cleaning corners and removing excess grout. *Painter's Tape (optional):
To protect adjacent surfaces and create clean grout lines. *White Vinegar or Mild Grout Cleaner:
For cleaning stubborn stains or mildew before applying new grout.The type of grout to be used is also a critical consideration. Common types of grout include:
*Cement-Based Grout:
The most common and affordable type, available in sanded and unsanded varieties. Sanded grout is suitable for grout lines wider than 1/8 inch, while unsanded grout is used for narrower grout lines to prevent scratching the tile surface. *Epoxy Grout:
Known for its superior durability, stain resistance, and waterproofing properties. It is more expensive than cement-based grout and requires faster application due to its quick setting time. Epoxy grout is generally recommended for high-moisture areas like shower floors.Choosing the correct type of grout and having all the necessary materials readily available will ensure a smoother and more efficient grout replacement process.
Removing the Old Grout
Removing the old grout is the most labor-intensive part of the grout replacement process. Patience and precision are essential to avoid damaging the surrounding tiles. Begin by preparing the work area. Clear any loose items from the shower and protect the shower walls and fixtures with plastic sheeting or drop cloths to prevent dust and debris from settling on them. Ensure adequate ventilation by opening windows or using a fan.
If using a utility knife, carefully score along the edges of the tile where it meets the grout. This helps to prevent chipping during the removal process. Holding the grout removal tool at a consistent angle and applying steady pressure is key. Avoid pressing too hard, which can damage the tile edges. Work along the grout lines, removing small sections at a time. Regularly vacuum up the dust and debris to maintain visibility and prevent it from spreading.
When using an oscillating multi-tool, select a grout removal blade that is appropriate for the width of the grout lines. Start at a low speed and gradually increase it as needed. Allow the tool to do the work, guiding it along the grout lines without applying excessive pressure. Be particularly careful when working near corners or around drains, as these areas are more prone to damage. Use a manual grout scraper or utility knife to remove any remaining grout fragments or stubborn areas that the power tool cannot reach.
After removing the bulk of the grout, thoroughly vacuum the entire shower floor to remove any remaining dust and debris. Inspect the tile edges for any loose or damaged pieces. If any tiles are loose or cracked, they should be repaired or replaced before proceeding. Clean the tile surface with a mild grout cleaner or white vinegar to remove any lingering stains or mildew. Allow the surface to dry completely before applying the new grout.
It's important to note that removing grout can be a noisy process. If working in an apartment or shared living space, consider informing neighbors beforehand to minimize disruptions. The duration of the grout removal process will depend on the size of the shower floor, the type of grout being removed, and the tool being used. Allocate sufficient time to complete the task properly, avoiding rushing, which can lead to mistakes and potential damage.
Applying and Sealing the New Grout
With the old grout removed and the shower floor thoroughly cleaned, the next step is to apply the new grout. If using powdered grout, carefully follow the manufacturer's instructions for mixing the grout with water. The consistency should be similar to that of peanut butter – thick enough to hold its shape but not too dry. Avoid over-mixing, which can introduce air bubbles into the grout.
Using a grout float, apply the mixed grout to the tile joints at a 45-degree angle. Press firmly to pack the grout into the joints, ensuring that they are completely filled. Work in small sections, applying grout to a manageable area before moving on. Remove excess grout from the tile surface with the grout float, holding it at a 45-degree angle and scraping it across the tiles. Try to remove as much excess grout as possible at this stage to minimize the amount of cleaning required later. Use the small brush to remove excess grout from corners and hard-to-reach areas.
After applying the grout, allow it to set for the amount of time recommended by the manufacturer. This typically ranges from 15 to 30 minutes, depending on the type of grout and the ambient temperature. Once the grout has set, use a damp grout sponge to clean the tile surface. Wring out the sponge frequently to avoid over-wetting the grout. Work in circular motions, removing any remaining grout haze. Rinse the sponge thoroughly after each pass to prevent redepositing grout residue onto the tiles. Be careful not to remove grout from the joints while cleaning.
A second cleaning with a clean, damp sponge may be necessary to remove any remaining grout haze. Allow the grout to cure completely, following the manufacturer's instructions. This can take anywhere from 24 to 72 hours, depending on the type of grout. Avoid using the shower during the curing process to allow the grout to harden properly.
Once the grout has fully cured, apply a grout sealer to protect it from water damage and staining. Follow the manufacturer's instructions for applying the sealer. Typically, this involves applying a thin, even coat of sealer to the grout lines using a small brush or applicator. Allow the sealer to penetrate the grout for a few minutes before wiping off any excess with a clean cloth. Allow the sealer to dry completely before using the shower. Reapply grout sealer periodically, typically every 6 to 12 months, to maintain its protective properties.
Proper application and sealing of the new grout are crucial for ensuring its longevity and preventing future problems. Following these steps carefully will help to create a durable and aesthetically pleasing shower floor.

How To Fix Holes In Shower Grout The Experts

How To Repair Shower Floor Grout Maintenance

How To Retile A Shower Floor Art Tile Renovation

How To Retile A Shower Floor Art Tile Renovation

How To Repair Bathroom Grout Step By Diy Guide

Easy Ways To Replace Bathroom Tiles With Pictures Wikihow

Can I Regrout My Shower Floor Here Are 3 Reasons You Should Not The Grout Medic Of Central New Jersey
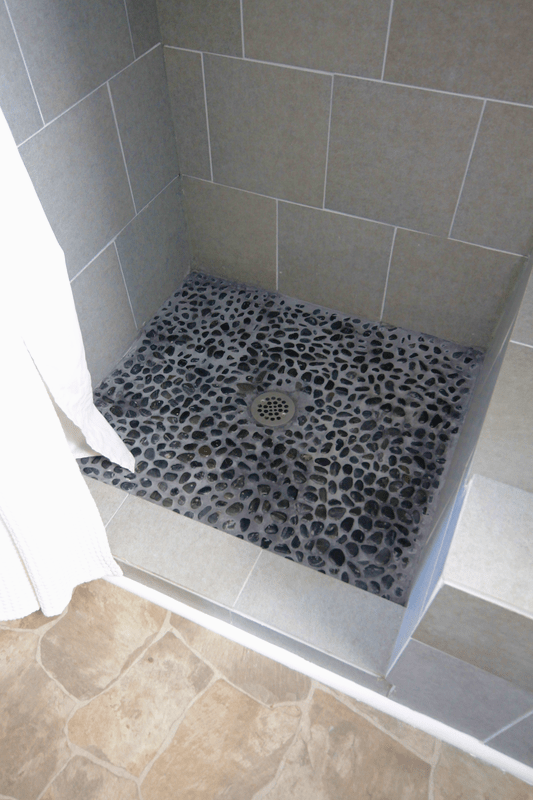
How To Grout Pebble Tile Decor Adventures

Here S How Add A Shower With Ceramic Tile Floor

How To Fix A Shower Floor Slope Art Tile Renovation
Related Posts


