How To Install Bathroom Floor Tile
Installing bathroom floor tile is a home improvement project that can significantly enhance the aesthetic and functionality of a bathroom. While it requires careful planning, preparation, and execution, the result is a durable, water-resistant, and visually appealing floor that can last for many years. This article outlines the necessary steps to successfully install bathroom floor tile, from initial preparation to final grout application.
Preparing the Subfloor
The foundation for a successful tile installation is a properly prepared subfloor. The subfloor must be structurally sound, clean, level, and dry to ensure that the tile adheres correctly and remains stable over time. Any imperfections in the subfloor will telegraph through the tile, leading to cracks, uneven surfaces, and potential failures.
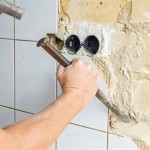
Begin by assessing the existing subfloor. If it is concrete, check for cracks, crumbling, or significant unevenness. Minor cracks can be filled with a concrete patching compound. Larger or structural cracks should be addressed by a professional. For wooden subfloors, such as plywood or OSB, inspect for water damage, rot, and loose or squeaky sections. Replace any damaged sections with new subfloor material of the same thickness.
Once the subfloor is inspected and repaired, clean it thoroughly. Remove any debris, dirt, dust, and adhesive residue using a shop vacuum and a scraper. For stubborn adhesive residue, a solvent-based adhesive remover may be necessary, following the manufacturer's instructions carefully and ensuring adequate ventilation.
Leveling the subfloor is crucial for a professional-looking tile installation. Use a self-leveling compound for concrete subfloors to create a smooth and even surface. Follow the manufacturer's instructions for mixing and application. For wooden subfloors, apply a layer of cement backer board, such as HardieBacker or Durock. The backer board provides a stable and water-resistant surface for tile installation. Screw the backer board to the subfloor using cement board screws, spacing them according to the manufacturer's recommendations. Apply thin-set mortar to the subfloor before installing the backer board to create a solid bond.
After installing the backer board, tape the seams between the boards with fiberglass mesh tape and apply a thin layer of thin-set mortar over the tape. This reinforces the seams and prevents cracking. Allow the mortar to dry completely before proceeding.
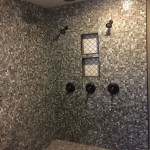
Finally, apply a waterproofing membrane to the entire subfloor area, especially around the shower or tub. This membrane protects the subfloor from moisture and prevents water damage. Follow the manufacturer's instructions for application, ensuring complete coverage and proper drying time.
Laying Out the Tile
Planning the layout of the tile is essential for achieving a visually appealing and symmetrical result. Proper layout minimizes cuts, especially in prominent areas, and ensures that the tile pattern is balanced. Before applying any mortar, dry-lay the tile to visualize the final appearance and make any necessary adjustments.
Begin by finding the center of the bathroom. Measure the length and width of the room and mark the center points on each wall. Snap chalk lines connecting the center points on opposite walls. The intersection of these chalk lines marks the center of the room. This center point will serve as the starting point for the tile layout.
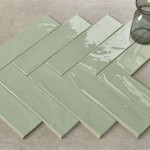
Determine the desired tile pattern and consider any design elements, such as borders or accent tiles. Place the first tile at the center point and work outwards towards the walls, maintaining consistent spacing between the tiles. Use tile spacers to ensure uniform grout lines. As you approach walls and fixtures, you will likely need to cut tiles to fit. Mark the cut lines on the tiles using a tile cutter or wet saw.
Pay close attention to areas around doorways, toilets, and other fixtures. Ensure that the tile layout is symmetrical and aesthetically pleasing in these areas. If necessary, adjust the starting point or the tile pattern to minimize awkward cuts or small tile pieces. A general guideline is to avoid cuts that are less than half a tile width.
Once the layout is finalized, mark the tile placement on the subfloor using a pencil or marker. This will serve as a guide during the mortar application process. Remove the dry-laid tiles and prepare the thin-set mortar according to the manufacturer's instructions.
Consider the placement of transitions between the tiled floor and other flooring materials, such as carpet or hardwood. Install transition strips to create a smooth and professional finish. These strips are available in various materials and styles to match the surrounding flooring.
Applying Mortar and Setting Tile
With the subfloor prepared and the tile layout planned, the next step is to apply the thin-set mortar and set the tile. Thin-set mortar is a cement-based adhesive that bonds the tile to the subfloor. Proper mortar application is crucial for a strong and durable tile installation.
Select a thin-set mortar that is specifically designed for use with the type of tile you are installing and the type of subfloor you have. Different types of thin-set mortar are available for porcelain, ceramic, and natural stone tiles, as well as for concrete and wooden subfloors. Follow the manufacturer’s instructions for mixing the mortar, adding water gradually and mixing thoroughly until a smooth, creamy consistency is achieved. Avoid adding too much water, as this can weaken the mortar.
Apply the thin-set mortar to the subfloor using a notched trowel. Select a trowel with the appropriate notch size for the size and type of tile you are installing. Hold the trowel at a 45-degree angle and spread the mortar evenly over a small area, typically about 2-3 square feet. Comb the mortar with the notched edge of the trowel to create ridges. These ridges provide a better bonding surface for the tile.
Place the tiles onto the mortar, pressing them firmly into place. Use a slight twisting motion to ensure good contact between the tile and the mortar. Insert tile spacers between the tiles to maintain consistent grout lines. Remove any excess mortar that squeezes up between the tiles with a damp sponge. Work in small sections, applying mortar and setting tile one section at a time.
Periodically check the level of the tiles using a level. If any tiles are uneven, gently tap them with a rubber mallet to adjust their height. Be careful not to over-tap, as this can damage the tile or disrupt the mortar bond. Allow the mortar to dry completely before proceeding, typically for 24-48 hours, depending on the manufacturer's instructions.
After the mortar has dried, remove the tile spacers. Inspect the tile installation for any imperfections, such as loose or uneven tiles. If necessary, carefully remove and replace any problematic tiles. Clean the tile surface with a damp sponge to remove any remaining mortar residue.
Cutting Tile
Cutting tiles is an unavoidable part of most tile installation projects. Accurate tile cuts are essential for achieving a professional-looking finish, especially around walls, fixtures, and doorways. Several tools are available for cutting tile, each with its own advantages and disadvantages.
A manual tile cutter, also known as a snap cutter, is suitable for cutting straight lines in ceramic and porcelain tiles. It consists of a scoring wheel that creates a score line on the tile surface and a breaking bar that snaps the tile along the score line. Manual tile cutters are relatively inexpensive and easy to use, but they are not suitable for cutting hard or thick tiles, or for making curved or intricate cuts.
A wet saw is a power tool that uses a diamond-tipped blade and water to cut tiles. Wet saws are capable of cutting a wide range of tile materials, including ceramic, porcelain, and natural stone. The water cools the blade and reduces dust, making wet saws a cleaner and more efficient option for cutting tile. Wet saws are more expensive than manual tile cutters, but they are a worthwhile investment for larger tile projects or for working with hard or thick tiles.
When cutting tile, always wear safety glasses and gloves to protect yourself from sharp edges and flying debris. Measure the area where the tile needs to be cut and mark the cut line on the tile using a pencil or marker. For straight cuts, use a straight edge or a tile square to ensure accuracy. For curved or intricate cuts, use a template or a contour gauge to trace the shape onto the tile.
When using a manual tile cutter, score the tile firmly along the cut line, applying even pressure. Then, position the tile in the cutter with the score line aligned with the breaking bar and press down firmly on the handle to snap the tile. When using a wet saw, feed the tile slowly and steadily into the blade, keeping the blade cool with water. Avoid forcing the tile, as this can cause the blade to bind or the tile to chip.
After cutting the tile, smooth the cut edges with a tile file or a rubbing stone. This removes any sharp edges and prevents chipping. Dry-fit the cut tile in place to ensure a proper fit. Make any necessary adjustments before applying mortar.
Grouting the Tile
Grouting is the final step in the tile installation process. Grout fills the spaces between the tiles, providing a watertight seal and enhancing the aesthetic appearance of the floor. Selecting the right type of grout and applying it properly are essential for a durable and long-lasting tile installation.
Choose a grout that is appropriate for the type of tile you have installed and the width of the grout lines. Sanded grout is typically used for grout lines that are 1/8 inch or wider, while unsanded grout is used for narrower grout lines. Epoxy grout is a more expensive option that is highly resistant to stains and chemicals, making it a good choice for bathrooms and kitchens.
Mix the grout according to the manufacturer's instructions, adding water gradually and mixing thoroughly until a smooth, creamy consistency is achieved. Avoid adding too much water, as this can weaken the grout. Allow the grout to slake for the recommended time, typically about 10 minutes, before mixing again.
Apply the grout to the tile surface using a grout float, holding the float at a 45-degree angle and spreading the grout diagonally across the grout lines. Press the grout firmly into the grout lines, ensuring that they are completely filled. Remove any excess grout from the tile surface with the grout float.
After allowing the grout to set for a few minutes, use a damp sponge to clean the tile surface. Wring out the sponge frequently and wipe the tile diagonally across the grout lines. Be careful not to remove too much grout from the grout lines. After the grout has set for a few more hours, use a clean, dry cloth to buff the tile surface and remove any remaining grout haze.
Allow the grout to cure completely before using the bathroom, typically for 24-72 hours, depending on the manufacturer's instructions. Apply a grout sealer to protect the grout from stains and moisture. Reapply the grout sealer periodically, as needed.
Proper ventilation is important during the grouting process. Open windows and doors, or use a fan to circulate the air. Wear gloves to protect your hands from the grout.

How To Tile Floors Walls Sincerely Sara D Home Decor Diy Projects

Laying Floor Tiles In A Small Bathroom Houseful Of Handmade

How To Install An Adhesive Vinyl Bathroom Tile Floor Merrypad

How To Tile A Bathroom Floor Ceramic Tiles Installation

Subfloor For Tile Installation Everything You Need To Know

How To Install A Tile Floor In Your Bathroom Dumpsters Com

Laying Floor Tiles In A Small Bathroom Houseful Of Handmade

Step By Guide Tiling Floors Like A Pro

Tips And Tricks To Lay Marble Basketweave Floor Tile The Diy Playbook

How To Install Tile Flush With Hardwood Floors Sawdust Girl
Related Posts