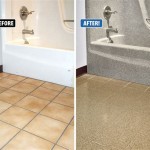
Essential Aspects of Installing Bathroom Shower Floor Tile
Transforming your bathroom with new shower floor tile is a rewarding DIY project that can enhance both the aesthetics and functionality of your space. To achieve professional-looking results, it's essential to follow the proper steps and pay attention to critical aspects of the installation process.
Step 1: Preparation
Meticulous preparation sets the stage for a successful installation. Begin by removing existing shower fixtures, including the showerhead, faucet, and drain cover. Remove the old tile carefully, using a chipping hammer or tile remover for stubborn areas. Clean the subfloor thoroughly, ensuring it's level and free from debris or imperfections.
Step 2: Waterproofing
Waterproofing the shower floor is crucial to prevent water damage. Apply a waterproof membrane to the subfloor, overlapping the edges by at least 6 inches. Install a pre-sloped shower pan if desired, which provides a built-in slope for water drainage.
Step 3: Thin-Set Mortar
Thin-set mortar acts as an adhesive between the subfloor and the tile. Use a notched trowel to apply a thin layer of mortar to the shower floor, working in small sections. Keep a consistent thickness of about 1/4 inch for optimal adhesion.
Step 4: Tile Placement
Place the tiles onto the thin-set mortar, starting from a corner and working your way out. Press down firmly to ensure good contact with the mortar. Use tile spacers to maintain consistent spacing between the tiles.
Step 5: Grouting
Once the tiles are set, fill the gaps between them with grout. Use a grout float to apply the grout, working diagonally across the tiles to fully pack it into the joints. Remove excess grout from the surface with a wet sponge.
Step 6: Sealing
To protect the grout and prevent water penetration, apply a grout sealer after it has dried for 24 hours. Use a paintbrush to apply the sealer, ensuring it penetrates the grout joints thoroughly.
Step 7: Reinstalling Fixtures
With the tile and grout installed, reinstall the shower fixtures and drain cover. Connect the plumbing and test the functionality of the shower before using it regularly.
Tips for Success
Use a level: Ensure the shower floor is level before tiling to prevent water pooling and drainage issues.
Allow for expansion: Leave a small gap around the perimeter of the tile installation to allow for expansion and contraction.
Clean as you go: Remove any excess thin-set mortar or grout from the tiles and grout joints as you work to prevent staining.
Use a moisture-resistant backer board: For added moisture protection, install a moisture-resistant backer board beneath the tiles.
Consider professional assistance: If you're unsure about any aspect of the installation process, don't hesitate to seek professional assistance from a qualified tile contractor.

3 Shower Pan Choices For A Solid Tile Floor Installation Fine Homebuilding

How To Build A Shower Pan Install Tile Floor Homeadvisor

How To Build A Shower Pan Install Tile Floor Homeadvisor

3 Shower Pan Choices For A Solid Tile Floor Installation Fine Homebuilding

How To Build A Shower Pan Install Tile Floor Homeadvisor

How To Retile A Shower Floor Art Tile Renovation

Tips And Tricks To Lay Marble Basketweave Floor Tile The Diy Playbook

Bathroom Renovation Tiling The Shower From Bathtub To Walk In Remodelando La Casa

How To Install A Shower Pan In Your Bathroom Bob Vila

How To Install A Shower Pan In Your Bathroom Bob Vila
Related Posts

