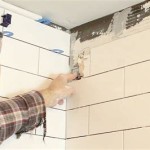
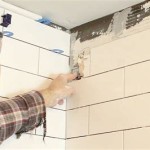
How To Install 12x24 Wall Tile In A Shower
Installing 12x24 wall tile in a shower can dramatically improve the aesthetic appeal and functionality of the space. While the larger format offers a sleek, modern look, it also demands precision and careful planning during installation. This article provides a comprehensive guide to successfully installing 12x24 wall tile in a shower, covering preparation, installation techniques, and essential considerations.
Preparing the Shower Space
Proper preparation is crucial for a long-lasting and visually appealing tile installation. Neglecting this stage can lead to issues such as tile slippage, water damage, and an uneven surface. The initial step involves a thorough inspection of the existing shower walls.
The first step is to assess the substrate. The substrate refers to the surface onto which the tile will be installed. It should be structurally sound, clean, and level. Common substrates for shower walls include cement board, also known as backer board, and waterproof gypsum board (often referred to as "green board" or "blue board," depending on the manufacturer). If using gypsum board, it's imperative to ensure it is specifically designed for wet areas. Cement board is generally preferred due to its superior water resistance and durability.
If the existing surface is not plumb (perfectly vertical) or level, it will need to be corrected. Minor imperfections can often be addressed with thin-set mortar during the tile installation process. However, significant deviations require more extensive remediation. This may involve applying shims or self-leveling compounds to create a flat and even surface. Using a long level and a straight edge will help identify these imperfections.
Next, ensure the substrate is clean. Remove old paint, wallpaper, adhesive residue, and any other debris that could interfere with the adhesion of the thin-set mortar. A scraper, wire brush, and appropriate cleaning solutions may be necessary. Vacuum the surface thoroughly to remove any loose particles.
Waterproofing is essential for preventing water damage in the shower. Even if using cement board, which is water-resistant, the seams and screw holes are vulnerable to moisture penetration. A waterproofing membrane should be applied over the entire surface of the shower walls before installing the tile. Several types of waterproofing membranes are available, including liquid-applied membranes, sheet membranes, and trowelable membranes. Liquid-applied membranes, such as RedGard or Hydro Ban, are popular choices because they are easy to apply and create a seamless, waterproof barrier. Sheet membranes, such as Schluter Kerdi, offer excellent waterproofing and are applied using thin-set mortar. Trowelable membranes provide a thick, durable layer of waterproofing.
Carefully follow the manufacturer's instructions for applying the waterproofing membrane. Typically, this involves applying multiple coats and ensuring that all seams, corners, and protrusions (such as shower niches) are properly sealed. Allow the membrane to cure completely before proceeding with the tile installation. Pay particular attention to the corners, where moisture is most likely to penetrate. Reinforcing the corners with reinforcing fabric embedded in the waterproofing membrane further enhances the waterproofing protection.
Finally, plan the tile layout. This crucial step determines the overall aesthetic of the shower. Consider the location of the showerhead, faucet, and any other fixtures when planning the layout. Avoid small slivers of tile at the edges of the shower, as they can look unprofessional and be difficult to install. Adjust the layout to ensure that the tile cuts are consistent and visually appealing. A common approach is to start with a full tile at the most visible wall and make cuts on less visible walls. Dry-laying the tile on the floor before installation allows for visualization and refinement of the layout.
Installing the 12x24 Wall Tile
With the preparation complete, the actual installation of the 12x24 wall tile can commence. This stage requires careful attention to detail and proper application of thin-set mortar to ensure a secure and even tile surface.
Gather the necessary tools and materials. These typically include the 12x24 wall tile, thin-set mortar (modified for large format tile), a notched trowel (sized appropriately for the tile), a mixing bucket, a drill with a mixing paddle, a tile cutter (wet saw is recommended), a level, tile spacers, a rubber mallet, a sponge, and clean water.
Mix the thin-set mortar according to the manufacturer's instructions. Add water gradually to achieve a smooth, consistent consistency similar to peanut butter. Avoid adding too much water, as this can weaken the mortar and compromise its bonding strength. Allow the mortar to slake (rest) for the recommended time, typically 5-10 minutes, and then remix it before use.
Apply the thin-set mortar to the wall using the notched trowel. Hold the trowel at a 45-degree angle and create ridges in the mortar. The size of the notches on the trowel will depend on the size and type of tile being used. For 12x24 wall tile, a 1/4" x 3/8" or 1/2" x 1/2" square-notch trowel is generally recommended. Ensure full mortar coverage on the back of each tile to prevent voids and ensure a strong bond. This technique, known as back buttering, is particularly important for large format tiles.
Place the first tile carefully against the wall, pressing it firmly into the mortar. Use a level to ensure that the tile is plumb and level. Insert tile spacers between the tiles to maintain consistent grout lines. The size of the grout lines depends on personal preference and the desired aesthetic. Common grout line widths for 12x24 wall tile range from 1/8" to 3/16".
Continue installing the tiles, working in small sections. Periodically check the level and plumb of the tiles to ensure that they are aligned correctly. Use a rubber mallet to gently tap the tiles into place and ensure good contact with the mortar. Remove any excess mortar from the face of the tiles with a damp sponge.
When cutting tiles, use a wet saw for clean, precise cuts. Measure the required cut carefully and mark the tile with a pencil. Feed the tile slowly and steadily through the wet saw to avoid chipping or breaking the tile. Be extra cautious when cutting around obstructions such as pipes or shower fixtures.
Pay close attention to the corners and edges of the shower. Miter the corners (cut the tiles at a 45-degree angle) for a seamless and professional look. Alternatively, use bullnose tiles or metal edging to finish the edges. These provide a clean and durable finish.
After all the tiles have been installed, allow the thin-set mortar to cure completely. The curing time varies depending on the type of mortar and environmental conditions, but typically it takes 24-72 hours. Avoid using the shower during this time to allow the mortar to fully harden.
Grouting and Sealing
Once the thin-set mortar has cured, the final steps involve grouting the tile and sealing the grout lines. Grouting fills the spaces between the tiles, providing a watertight seal and enhancing the overall aesthetic of the shower. Sealing the grout lines protects them from stains and mildew.
Remove the tile spacers and clean the grout lines thoroughly. Any loose debris or mortar residue can interfere with the adhesion of the grout. Use a grout saw or a utility knife to remove any excess mortar from the grout lines.
Mix the grout according to the manufacturer's instructions. Choose a grout color that complements the tile and the overall design of the shower. Epoxy grout is often recommended for showers because it is more water-resistant and stain-resistant than cement-based grout. However, epoxy grout can be more difficult to work with and requires careful application.
Apply the grout to the tile surface using a grout float. Hold the float at a 45-degree angle and work the grout into the grout lines, ensuring that they are completely filled. Remove excess grout from the tile surface with the grout float, again holding it at a 45-degree angle.
After the grout has set for the recommended time (typically 15-30 minutes), use a damp sponge to clean the tile surface. Rinse the sponge frequently in clean water and wring it out thoroughly to avoid over-wetting the grout lines. Repeat this process until the tile surface is clean and free of grout haze.
Allow the grout to cure completely according to the manufacturer's instructions. This typically takes 24-72 hours. Avoid using the shower during this time.
Once the grout has cured, apply a grout sealer to protect the grout lines from stains and mildew. Follow the manufacturer's instructions for applying the sealer. Typically, this involves applying the sealer with a brush or applicator and allowing it to penetrate the grout lines. Wipe off any excess sealer from the tile surface.
Regularly clean the shower and reapply the grout sealer as needed to maintain the appearance and integrity of the grout lines. Use a mild soap and water solution to clean the tile surface. Avoid using abrasive cleaners, as they can damage the tile and grout.
With careful planning, preparation, and execution, installing 12x24 wall tile in a shower can result in a beautiful and functional space. The larger format tiles offer a modern and elegant look while also minimizing grout lines, making the shower easier to clean and maintain. By following these guidelines, one can achieve a professional-quality tile installation that will last for years to come.
How To Tile A Shower Wall Thats 50 Inches In Length With 24x12 Inch Tiles Without It Looking Sloppy Quora
How To Tile A Shower Wall Thats 50 Inches In Length With 24x12 Inch Tiles Without It Looking Sloppy Quora
How To Tile A Shower Wall Thats 50 Inches In Length With 24x12 Inch Tiles Without It Looking Sloppy Quora

Installing A Shower Seat In Your Bathroom Complete Guide

Don T Be Afraid How To Install Big Tiles On A Ceiling Steam Shower

Wood Tile Wall Bathroom Makeover Beneath My Heart
Shower Tile Bathroom Floor Decor

Msi Carrara White 12 In X 24 Polished Marble Floor And Wall Tile Sq Ft Case Tcarrwht1224 The Home Depot

Wood Tile Wall Bathroom Makeover Beneath My Heart

Daltile Newgate Gray Marble Matte 12 In X 24 Glazed Ceramic Floor And Wall Tile 15 04 Sq Ft Case Nw071224hd1pv The Home Depot
Related Posts

