Creating a Stunning Boat Deck With Tiles On Top
Transforming a boat deck with tiling offers an aesthetic upgrade while potentially providing enhanced functionality and durability. The process requires careful planning, material selection, and precise execution to ensure a long-lasting and visually appealing result. This article outlines the key considerations and steps involved in creating a stunning boat deck with tiles.
Planning and Preparation
The initial phase of tiling a boat deck involves meticulous planning. This includes assessing the existing deck condition, determining the desired aesthetic, and selecting appropriate tiling materials. The structural integrity of the deck must be evaluated to ensure it can support the added weight of the tiles and associated setting materials. Existing damage, such as cracks or soft spots, requires repair before proceeding. Ignoring these issues may compromise the longevity and stability of the tiled surface.
Accurate measurements of the deck area are crucial for calculating the necessary quantity of tiles and setting materials. It is advisable to order slightly more material than calculated to account for cuts, breakages, and potential errors. A detailed layout plan should be developed to visualize the tile arrangement, incorporating design elements such as borders, patterns, and grout lines. Consideration should be given to drainage patterns, ensuring that water flows efficiently off the tiled surface and does not pool in specific areas. The layout plan should also accommodate access points for maintenance or repairs of underlying systems.
The selection of appropriate tools and equipment is essential for a successful tiling project. This includes a tile cutter, trowel, notched spreader, rubber mallet, level, measuring tape, pencil, and cleaning supplies. Personal protective equipment, such as gloves, safety glasses, and a dust mask, should be worn during all phases of the project to minimize potential hazards. A clean and organized workspace will facilitate the tiling process and improve the overall quality of the finished product.
The existing deck surface must be properly prepared to ensure optimal adhesion of the tile adhesive. This typically involves cleaning the surface to remove dirt, grease, and other contaminants. If the existing deck surface is painted or coated, it may be necessary to roughen it up with sandpaper or a grinder to create a better bonding surface. In some cases, a primer or bonding agent may be required to enhance adhesion, particularly with certain types of decking materials. The preparation process should be carried out in accordance with the manufacturer's recommendations for the specific adhesive being used.
Material Selection
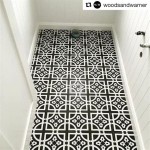
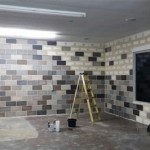
Choosing the right materials is a critical factor in the success of a boat deck tiling project. The tiles themselves should be durable, water-resistant, and slip-resistant, as well as aesthetically pleasing. Porcelain tiles are a popular choice due to their strength, low water absorption, and wide range of colors and styles. Other options include natural stone tiles, such as slate or granite, which offer a unique and luxurious look. However, natural stone tiles may require more maintenance and are potentially more porous than porcelain tiles. Composite tiles, made from recycled materials, provide an environmentally friendly alternative with good durability and water resistance.
The tile adhesive must be specifically designed for marine environments and capable of withstanding the constant exposure to water, salt, and temperature fluctuations. Flexible adhesives are preferred as they can accommodate the movement and flexing of the boat deck without cracking or debonding. The adhesive should also be compatible with the chosen tile material and the existing deck surface. It is essential to follow the manufacturer's instructions for mixing and application to ensure optimal performance.
The grout used to fill the joints between the tiles should also be water-resistant and mold-resistant. Epoxy grout is a good choice for boat decks as it is highly durable, stain-resistant, and easy to clean. Cement-based grout is a more economical option, but it requires sealing to prevent water penetration and staining. The grout color should be chosen to complement the tiles and the overall aesthetic of the deck. A flexible sealant should be applied at the perimeter of the tiled area and around any fixtures or fittings to prevent water ingress and allow for expansion and contraction of the deck.
Consideration should also be given to the weight of the selected materials. Heavy tiles can add significant load to the boat, potentially affecting its performance and stability. It is important to consult with a naval architect or marine surveyor to ensure that the proposed tiling project does not exceed the boat's weight capacity. Lightweight tiling options, such as thin porcelain tiles or composite tiles, may be preferred in situations where weight is a critical concern.
The Tiling Process
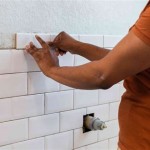
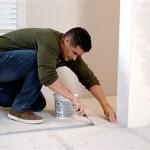
The tiling process begins with applying the adhesive to the prepared deck surface. Using a notched spreader, the adhesive should be spread evenly over a small area, typically the size of one or two tiles. The tiles are then carefully placed onto the adhesive, ensuring proper alignment and spacing. A rubber mallet can be used to gently tap the tiles into place and ensure good contact with the adhesive. It is important to work in small sections and continuously check the level of the tiles to maintain a uniform surface.
Spacers are used to maintain consistent grout lines between the tiles. The size of the spacers will depend on the desired width of the grout lines. The spacers should be inserted between the tiles as they are being placed and removed after the adhesive has set. The grout lines should be kept clean and free of adhesive to ensure proper grouting later on. Any excess adhesive that squeezes out between the tiles should be removed immediately with a damp sponge.
Cutting the tiles to fit around corners, edges, and fixtures requires precision and skill. A tile cutter can be used to make straight cuts, while a wet saw is necessary for more complex shapes and angles. It is advisable to practice cutting on scrap tiles before working on the actual tiles. The edges of the cut tiles should be smooth and clean to avoid sharp edges or uneven surfaces. Any sharp edges can be smoothed with a grinder or sanding block.
After the adhesive has fully cured, the grouting process can begin. The grout is mixed according to the manufacturer's instructions and applied to the grout lines using a grout float. The grout is worked into the joints, ensuring that they are completely filled. Excess grout is then removed from the tile surface with a damp sponge. The tiles should be cleaned repeatedly with a clean sponge and water to remove any remaining grout residue. After the grout has dried, it should be sealed with a grout sealer to protect it from water penetration and staining.
Once the grouting is complete and the sealant has been applied, the tiled deck should be allowed to cure for the recommended period of time before being subjected to heavy use. This will allow the adhesive and grout to fully harden and bond, ensuring a long-lasting and durable surface. Regular cleaning and maintenance will help to preserve the beauty and functionality of the tiled deck for years to come.
Properly installed tiling on a boat deck can dramatically improve both its aesthetics and functionality, offering a durable, slip-resistant, and visually appealing surface for enjoying time on the water. However, careful planning, appropriate material selection, and precise execution are essential for achieving a successful and long-lasting result. This article provides a foundational understanding of the key steps involved in creating a stunning boat deck with tiles.

How To Select The Right Boat Flooring Discover Boating

Laying Teak Decking On Board With Mark Corke

Interlocking Tiles Pavers Best Ways To Cover An Old Deck Ideas

Five Popular Boat Flooring Ideas Tiles And Mats

Installing A Teak Deck On Zatara Works

Laying Teak Decking On Board With Mark Corke

Interlocking Tiles Pavers Best Ways To Cover An Old Deck Ideas

We Found The Best Boat Decking Easy To Clean Durable Great Designs Reflex

Your Ultimate Guide To Eva Foam Boat Flooring Faqs Answered Hjdeck

7 Types Of Boat Flooring Options You Should Know Dekit Fort Myers
Related Posts