What To Put Under Self-Adhesive Vinyl Tiles in Shower Floors
Installing self-adhesive vinyl tiles in a shower floor might seem like a quick and cost-effective solution for a bathroom renovation. However, the success of this installation hinges heavily on proper preparation and the selection of appropriate underlayment or substrate. The shower environment presents unique challenges – constant moisture, temperature fluctuations, and the potential for standing water – all of which can compromise the adhesive and integrity of the vinyl tiles if the underlying surface isn't adequately prepared.
This article delves into the essential considerations and necessary steps involved in prepping a shower floor for self-adhesive vinyl tiles. It outlines the types of materials suitable for underlayment, the importance of waterproofing, and the application techniques that contribute to a durable and long-lasting shower floor. While self-adhesive vinyl tiles offer ease of installation, neglecting the foundation can lead to costly repairs and premature failure.
Ensuring a Solid and Level Substrate
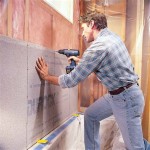
The paramount requirement for any flooring installation, especially in a shower, is a solid and level substrate. Self-adhesive vinyl tiles will only adhere properly and maintain their integrity if the surface beneath is free from imperfections. Any inconsistencies, such as cracks, uneven spots, or debris, will telegraph through the thin vinyl and eventually lead to the tiles lifting, cracking, or becoming susceptible to water damage.
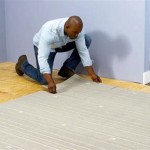
Therefore, the first step is a thorough inspection of the existing shower floor. If there are existing tiles, they must be completely removed, along with any residual adhesive or grout. The underlying concrete or cement board must then be assessed for cracks or damage. Small cracks can often be filled with a concrete crack filler or epoxy patch. Larger cracks, however, may indicate a more significant structural issue that requires professional attention. If the existing floor is severely damaged or uneven, it might be necessary to install a new concrete or cement board base.
Once the subfloor is structurally sound, it's crucial to ensure it's perfectly level. A self-leveling compound is typically used for this purpose. This compound is a liquid that is poured over the floor and spreads out to create a smooth, even surface. It is important to choose a product specifically designed for wet environments and to follow the manufacturer's instructions carefully. Allow the self-leveling compound to cure completely before proceeding to the next step.
Proper cleaning is essential after the leveling compound has cured. Remove any dust, debris, or residue that may interfere with the adhesion of the vinyl tiles. A vacuum cleaner and a damp mop can be used for this purpose. Ensure the surface is completely dry before proceeding.
The Importance of a Waterproofing Membrane
While a level and solid substrate is crucial, it is not sufficient for a shower floor. The most critical aspect of preparing a shower floor for any type of flooring, including self-adhesive vinyl, is waterproofing. Water penetration is the primary cause of flooring failure in showers, leading to mold growth, structural damage, and costly repairs. Self-adhesive vinyl tiles, despite being water-resistant, are not waterproof and will allow water to seep through the seams and edges if not properly protected underneath.
A waterproofing membrane creates an impermeable barrier between the subfloor and the vinyl tiles, preventing water from reaching the underlying structure. Several types of waterproofing membranes are suitable for shower floors, each with its own advantages and disadvantages.
Liquid waterproofing membranes are a popular choice. These are typically applied with a brush or roller and create a seamless, flexible barrier. They are relatively easy to apply and can conform to complex shapes and corners. Several coats may be required to achieve the desired thickness and waterproofing effectiveness.
Sheet membranes, such as rubberized asphalt or polyethylene membranes, are another option. These membranes are pre-formed sheets that are glued or adhered to the subfloor. They offer excellent waterproofing properties and are generally more durable than liquid membranes. However, they can be more difficult to install, especially in tight spaces or around drains.
Regardless of the type of waterproofing membrane chosen, it is crucial to follow the manufacturer's instructions carefully. Pay particular attention to the seams and corners, as these are the most vulnerable areas for water penetration. Use appropriate sealing materials, such as seam tape or sealant, to ensure a watertight seal. Extend the waterproofing membrane several inches up the shower walls to prevent water from wicking up from the floor.
Before proceeding with the vinyl tile installation, allow the waterproofing membrane to cure completely, as specified by the manufacturer. This will ensure that the membrane has reached its full waterproofing potential.
Selecting and Applying Primer/Adhesive Enhancer
Even with a perfectly level and waterproofed subfloor, self-adhesive vinyl tiles may not adhere properly if the surface is not properly primed. A primer, or adhesive enhancer, prepares the surface to receive the adhesive on the back of the vinyl tiles, promoting a stronger and more durable bond. This is particularly important in a shower environment, where constant moisture and temperature fluctuations can weaken the adhesive over time.
When selecting a primer, it's imperative to choose one specifically designed for use with vinyl flooring and suitable for wet environments. Acrylic primers are generally a good choice, as they offer excellent adhesion and water resistance. Some primers also contain antimicrobial agents that help prevent mold and mildew growth, which is particularly beneficial in a shower.
The application of the primer is a crucial step. Ensure the waterproofed surface is clean, dry, and free of any dust or debris. Apply the primer evenly using a roller or brush, following the manufacturer's instructions. Avoid applying too much primer, as this can create a slippery surface that hinders adhesion. Conversely, applying too little primer may not provide sufficient adhesion.
Allow the primer to dry completely before installing the vinyl tiles. The drying time will vary depending on the type of primer and the ambient temperature and humidity. Refer to the manufacturer's instructions for the recommended drying time. The surface should feel slightly tacky to the touch when it's ready for the vinyl tile installation.
In some cases, particularly when dealing with a particularly porous or difficult-to-bond surface, a thin layer of floor leveler or patching compound designed for wet areas can be applied *after* the waterproofing membrane and *before* the primer. This creates an even more uniform and receptive surface for the adhesive. The choice to use this additional layer depends on the specific conditions of the shower floor and the recommendations of the vinyl tile manufacturer.
Finally, it is crucial to remember that perimeter sealing is essential even with the best subfloor preparation. Use a high-quality, mold-resistant sealant along the edges where the vinyl tile meets the shower walls and around the drain. This creates a watertight seal that prevents water from seeping under the tiles and compromising the installation.
By focusing on a solid and level substrate, implementing a robust waterproofing membrane, and utilizing a suitable primer, the shower floor will be adequately prepared for the installation of self-adhesive vinyl tiles. This approach minimizes the risk of future problems and enhances the longevity of the flooring.

Suitable Subfloors For Self Adhesive Vinyl Floor Tiles Planks Best Surface To Install L Stick

Vatican Tile Wall Stair Floor Self Adhesive Vinyl Stickers Kitchen Bathroom Backsplash Carrelage Decal L Stick Home Decor

Can I Add L And Stick Tiles Over My Existing Ed Quora

D C Fix Vivid Stars Self Adhesive Vinyl Floor Tiles Pack Of 11 1sqm Diy At B Q

Self Adhesive Vinyl Flooring Wall Stickers Tiles Waterproof L And Stick For Home Decor China Floor Bathroom Tile Made In Com

Veelike L And Stick Floor Tiles 12 X12 4 Sq Ft Bathroom Vinyl Flooring Self Adhesive Waterproof Kitchen Stickers Removable Sheet Com

Veelik 24 Pack Marble L And Stick Vinyl Flooring For Bathroom 12 X12 Waterproof Floor Tiles Removable Gray Self Adhesive Stickers Kitchen Bedroom Decor Com

Self Adhesive Floor Tiles 13eur M2 Plastic Vinyl Kitchen Bathroom Tile Stickers Wood Look Stone Ornaments Flooring Diy New Zealand

Veelike Marble L And Stick Floor Tile 12 X12 Removable Self Adhesive Vinyl Flooring Waterproof Pack Grey White Tiles Stickers For Bedroom Bathroom Living Room Com

Quality Self Adhesive Vinyl Floor Tiles Kitchen Bathroom Home Flooring Grey New
Related Posts