How to Tile a Fireplace: A Comprehensive Guide, Including Pros and Cons
Tiling a fireplace surround is a popular way to enhance its aesthetic appeal and create a focal point in a room. Tile offers a wide range of design possibilities, from classic to contemporary, and can be chosen to complement or contrast with existing decor. However, tiling a fireplace is a project that requires careful planning and execution. This article provides a comprehensive guide to tiling a fireplace, including the necessary steps, materials, and considerations, as well as a balanced assessment of the advantages and disadvantages of undertaking this project.
Planning and Preparation: A Crucial First Step
Before embarking on the tiling process, a thorough assessment of the existing fireplace surround is essential. The first step involves determining the suitability of the existing surface for tiling. If the surface is brick, concrete, or a similar masonry material, it is generally a good base for tiling. However, if it is wood or another combustible material, it must be properly prepared to ensure fire safety. This might involve installing a non-combustible backer board, such as cement board, to create a safe and tile-ready substrate. Always consult local building codes and regulations regarding fireplace safety.
Accurate measurements of the fireplace surround are paramount. These measurements will determine the amount of tile needed and will guide the layout process. Consider the desired tile pattern and any decorative elements, such as borders or accents. Once the measurements are taken, it is advisable to purchase slightly more tile than calculated (approximately 10-15% extra) to account for cuts, breakage, and potential future repairs. This extra tile ensures consistency if a replacement is needed down the line.
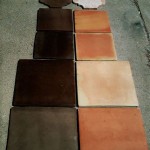
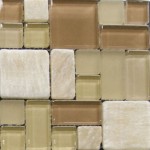
The selection of appropriate tile is also vital. Consider the style of the room and the desired aesthetic. Tile materials suitable for fireplace surrounds include ceramic, porcelain, natural stone (such as marble or slate), and glass. Porcelain tile is generally considered a durable and versatile option, while natural stone offers a unique and luxurious look. Glass tile can add a modern and reflective element. Critically, ensure the chosen tile is rated for the temperature fluctuations that occur around a fireplace. Some tiles are more resistant to cracking and discoloration than others.
Furthermore, gather all necessary tools and materials. A well-equipped toolkit will contribute to a smoother and more professional outcome. Essential tools include a notched trowel, a tile cutter (wet saw or manual snap cutter), a level, a measuring tape, a pencil, a rubber mallet, a sponge, buckets, and safety glasses. Necessary materials include thin-set mortar, grout, sealant, backer board (if needed), and possibly spacers to maintain consistent grout lines.
The Tiling Process: Step-by-Step Instructions
Once the planning and preparation phases are complete, the actual tiling process can begin. The first step is to prepare the surface by cleaning it thoroughly. Remove any dust, dirt, grease, or loose debris. If the surface is uneven, consider applying a skim coat of mortar to create a smooth and level base. Allow the mortar to dry completely before proceeding.
Next, apply thin-set mortar to the back of each tile using a notched trowel. The notches in the trowel help to distribute the mortar evenly and create a strong bond between the tile and the surface. Apply the mortar in a consistent direction, typically in a swirled or parallel pattern. Press the tile firmly onto the fireplace surround, ensuring that it is level and aligned with the adjacent tiles. Use tile spacers to maintain consistent grout lines. Gently tap the tiles with a rubber mallet to ensure proper adhesion.
Continue tiling the fireplace surround, working your way across the surface. For tiles that require cutting, use a tile cutter (wet saw or manual snap cutter) to achieve clean and precise cuts. Measure the required cut carefully and mark the tile before cutting. When working with intricate patterns or designs, pre-planning the layout on a dry surface before applying mortar is highly recommended. This allows for adjustments and ensures the overall design is visually appealing.
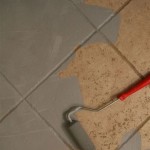
Allow the thin-set mortar to cure according to the manufacturer's instructions, typically for 24-48 hours. During this time, avoid disturbing the tiles. Once the mortar is fully cured, the grout can be applied. Mix the grout according to the manufacturer's instructions and apply it to the grout lines using a grout float. Press the grout firmly into the lines, ensuring they are completely filled. Remove excess grout from the tile surface with a damp sponge.
After the grout has partially dried (typically after 30-60 minutes), use a clean, damp sponge to smooth the grout lines and remove any remaining grout residue from the tile surface. Rinse the sponge frequently to avoid spreading the grout. Allow the grout to cure completely, typically for 24-72 hours, according to the manufacturer's instructions.
Finally, apply a sealant to the grout lines to protect them from moisture and staining. This sealant will help to prevent the grout from absorbing dirt and debris, making it easier to clean. Apply the sealant according to the manufacturer's instructions, typically using a small brush or applicator. Allow the sealant to dry completely before using the fireplace.
Pros and Cons of Tiling a Fireplace
Tiling a fireplace surround offers several advantages. One of the primary benefits is the enhanced aesthetic appeal. Tile provides a wide range of design options, allowing homeowners to customize the look of their fireplace to match their personal style and the overall decor of the room. Tile can dramatically transform a dated or unattractive fireplace into a stylish focal point.
Durability is another significant advantage of tile. Tile is a hard-wearing material that can withstand the heat and wear and tear associated with a fireplace. It is also resistant to scratches, stains, and moisture, making it a low-maintenance option. Unlike some other materials, tile will not warp or crack easily under the fluctuating temperatures near a fireplace.
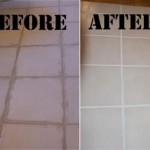
Furthermore, tile is relatively easy to clean. Regular cleaning with a damp cloth and mild detergent is typically sufficient to maintain its appearance. Grout sealant, as mentioned earlier, further simplifies cleaning by preventing dirt and stains from penetrating the grout lines.
However, tiling a fireplace also has some disadvantages. The initial cost of materials and tools can be significant, especially if high-end tile is chosen. The cost of professional installation can also be substantial, potentially doubling or tripling the overall project cost.
Installation can be a time-consuming and labor-intensive process, particularly for individuals with limited experience in tiling. Achieving a professional-looking result requires patience, precision, and attention to detail. Imperfect cuts, uneven grout lines, or poorly adhered tiles can detract from the overall appearance of the finished project.
The removal of existing materials can also present challenges. If the existing fireplace surround is covered with brick, stone, or other difficult-to-remove materials, the removal process can be messy and time-consuming. It may also be necessary to repair any damage to the underlying structure before tiling.
Another potential drawback is the possibility of future repairs. While tile is durable, it is not indestructible. Cracks, chips, or loose tiles may occur over time, necessitating repairs or replacements. Matching existing tile can be challenging, especially if the original tile has been discontinued.
Finally, grout can be prone to staining and discoloration over time, especially in areas with high foot traffic or exposure to moisture. Regular cleaning and resealing can help to prevent these issues, but it is an ongoing maintenance requirement.
Choosing the right thin-set mortar is crucial for the longevity of the tiled fireplace. Consider factors such as the type of tile, the substrate (backer board or existing fireplace material), and the expected temperature fluctuations. Some thin-set mortars are specifically formulated for high-heat applications. Reading the manufacturer's data sheets and consulting with a tile professional is recommended.
Proper ventilation is also paramount during the installation process, especially when working with thin-set mortar, grout, and sealants. These products can release volatile organic compounds (VOCs) that can be harmful if inhaled. Ensure adequate ventilation by opening windows and doors or using a fan to circulate air. Wear appropriate personal protective equipment (PPE), such as gloves and a mask, to minimize exposure to these substances.

The Fireplace Tile Guide For Your Home Oasis

Er Friendly Fireplace Makeover With L Stick Tiles The Homes I Have Made

Er Friendly Fireplace Makeover With L Stick Tiles The Homes I Have Made

Diy Tile Fireplace Makeover The Home Depot

Er Friendly Fireplace Makeover With L Stick Tiles The Homes I Have Made

Pros And Cons To A Raised Hearth I Ve Wanted One From The Beginning But Now Questioning If They Take Up Too Much Space Like Idea Of Extra Seating We Al

Freezing February Tiles To Use With Fireplaces Woodburners Tile Mountain

Thinking Of Getting A Gas Fireplace Here Are The Pros And Cons

Cast Stone Fireplaces So Much Better With Age

Er Friendly Fireplace Makeover With L Stick Tiles The Homes I Have Made
Related Posts