How to Install Adhesive Vinyl Floor Tiles
Adhesive vinyl floor tiles offer a budget-friendly and stylish solution for updating any room. These tiles are easy to install and require minimal tools, making them a popular choice for DIY projects. This article will guide you through the process of installing adhesive vinyl floor tiles, ensuring a successful and professional-looking outcome.
1. Preparing the Subfloor
A smooth and clean subfloor is crucial for a successful installation. Begin by removing any existing flooring, including the old adhesive if necessary. Sweep and vacuum the subfloor thoroughly to eliminate dirt, debris, and dust particles. Repair any cracks, gaps, or uneven areas with patching compound and allow it to dry completely. If the subfloor is uneven, consider using a self-leveling compound for a perfectly flat surface.
2. Measuring and Planning
Accurate measurements are essential to determine the required number of tiles and to ensure a seamless installation. Measure the length and width of the room and calculate the total area to be covered. Account for any existing fixtures or obstructions like doors, windows, or appliances. Create a layout plan on paper, marking the placement of the tiles and considering the direction of the light to minimize shadows.
3. Cutting Tiles
Depending on the room's dimensions, you may need to cut some tiles to fit properly. Use a utility knife or a specialized tile cutter to make straight cuts. Place the tile on a cutting mat or a piece of scrap wood and score the tile with the knife along the desired line. Apply pressure to snap the tile cleanly along the score mark. For curved or intricate cuts, use a jigsaw with a fine-tooth blade.
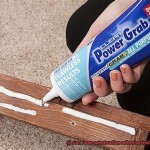
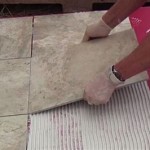
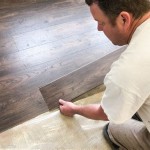
4. Installing the Tiles
Before applying the tiles, ensure the subfloor is clean and free of debris. Peel back a small portion of the backing paper on the first tile and carefully position it on the subfloor, aligning it with the layout plan. Press firmly on the tile to activate the adhesive. Continue installing the tiles, working your way across the room and ensuring that the tiles are tightly butted together. If using multiple boxes of tiles, try to intermix them to avoid noticeable color variations.
5. Rolling and Finishing
Once the tiles are laid, use a roller to firmly press down on the entire surface, ensuring good adhesion and eliminating any air bubbles. Allow the adhesive to cure as per the manufacturer's instructions, typically 24 hours. Wipe away any excess adhesive with a damp cloth. After the curing time, you can install baseboards or trim around the edges of the floor tiles for a finished look.
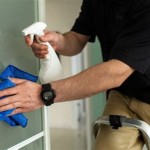
6. Maintenance and Cleaning
Adhesive vinyl floor tiles are relatively low-maintenance and require simple cleaning routines to maintain their appearance. Sweep or vacuum regularly to remove dust and debris. For spills, use a damp mop with a mild cleaning solution. Avoid abrasive cleaners, as they can damage the tile surface.
Following these steps will ensure a successful installation of adhesive vinyl floor tiles, creating a beautiful and durable floor that can enhance the look of any room.

How To Install L And Stick Vinyl Plank Flooring The Nifty Nester

How To Install L And Stick Vinyl Tile On Concrete Floor Self Installation

Putting Down Self Adhesive Vinyl Floor Tiles Flooring Supplies

How To Install Self Adhesive Vinyl Floor Tiles

How To Install Vinyl Floor Tiles Homebase

How To Install L And Stick Vinyl Tiles Houseful Of Handmade

How To Install L And Stick Vinyl Tile Flooring The Home Depot

How To Install L And Stick Vinyl Tiles Houseful Of Handmade

Tips For Installing Self Adhesive Vinyl Flooring

How To Lay Vinyl Flooring Sheets Tiles And Planks Tarkett
Related Posts