How To Install Vinyl Flooring Over Ceramic Tile
Installing vinyl flooring over existing ceramic tile offers a cost-effective and less disruptive alternative to removing the original tile. This approach can refresh the aesthetic of a space without the labor and expense associated with demolition and subfloor preparation. However, proper preparation and installation techniques are crucial to ensure a successful and long-lasting result. The following guide outlines the steps involved in installing vinyl flooring over ceramic tile, covering necessary preparations, material selection, and installation procedures.
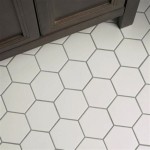
Before embarking on the installation process, assess the current condition of the ceramic tile. Look for cracked, loose, or uneven tiles. These imperfections will telegraph through the vinyl flooring, potentially causing damage and compromising the final appearance. Addressing these issues before installation is paramount. Furthermore, consider the type of vinyl flooring being installed. Sheet vinyl, luxury vinyl tile (LVT), and vinyl plank flooring (VPF) each have different installation requirements and adhesive considerations.
Assessing and Preparing the Ceramic Tile Surface
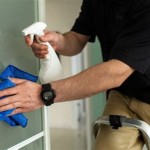
The first step in preparing the ceramic tile surface is a thorough cleaning. Remove any dirt, debris, wax, or existing sealers. Use a strong degreasing cleaner and a scrub brush to ensure the surface is free of contaminants. Rinse the area thoroughly with clean water and allow it to dry completely. This step is critical for proper adhesion of the vinyl flooring.
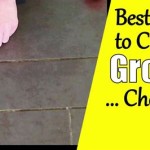
Inspect each tile for cracks, chips, or loose grout. Any damaged tiles must be repaired or replaced. Loose grout should be removed and replaced with new grout. For small cracks in the tiles, a tile repair epoxy can be used to fill the cracks. For severely damaged tiles, consider removing the tile entirely and patching the resulting hole with a cement-based patching compound. Allow the patching compound to dry and cure according to the manufacturer's instructions.
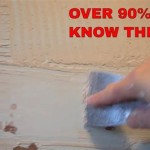
Leveling the surface is the next crucial step. While minor grout lines may be acceptable depending on the thickness of the vinyl flooring, larger grout lines, uneven tiles, or transitions between different flooring materials can create noticeable bumps or dips. A self-leveling underlayment is typically recommended to create a smooth, even surface. Choose a self-leveling compound specifically designed for use over ceramic tile. Follow the manufacturer's instructions carefully when mixing and applying the compound. This usually involves priming the tile surface and then pouring and spreading the self-leveling compound to the desired thickness. Allow the underlayment to dry and cure completely before proceeding with the vinyl flooring installation. Consider the time it takes to complete the curing process as part of the entire project timeframe.
Once the self-leveling compound has cured, inspect the surface for any imperfections. Minor imperfections can be sanded smooth using a sanding block or orbital sander with a fine-grit sandpaper. Vacuum the entire area thoroughly to remove any dust or debris created during the sanding process. A clean, smooth, and level surface is essential for a professional-looking and long-lasting vinyl floor.
Selecting the Appropriate Vinyl Flooring and Adhesive
The choice of vinyl flooring depends on several factors, including budget, desired aesthetic, and the amount of foot traffic the area will receive. Sheet vinyl is typically the least expensive option but can be more difficult to install due to its large size. LVT and VPF are available in a wide range of styles and are generally easier to install, especially for DIY projects. Consider the wear layer of the vinyl flooring, which indicates its resistance to scratches and wear. A thicker wear layer is recommended for high-traffic areas.
The type of adhesive used is critical for a successful installation. Choose an adhesive specifically recommended for use with the chosen vinyl flooring and the existing ceramic tile surface. Some vinyl flooring products are designed for "floating" installations, meaning they do not require adhesive. These products typically have interlocking edges that click together. If using an adhesive, carefully read the manufacturer's instructions regarding application techniques, drying times, and coverage rates. Applying too much or too little adhesive can compromise the bond and lead to future problems.
For sheet vinyl, a full-spread adhesive is generally required, meaning the adhesive is applied to the entire surface of the subfloor. For LVT and VPF, some adhesives are applied only to the perimeter of the room or in specific areas. Others may require a full-spread application. Consulting the vinyl flooring manufacturer's specifications is essential to ensure proper adhesive selection and application.
Installing the Vinyl Flooring
Before beginning the installation, allow the vinyl flooring to acclimate to the room temperature for at least 48 hours. This allows the material to expand or contract, minimizing the risk of future buckling or gapping. Store the vinyl flooring in the room where it will be installed, preferably laid out flat.
For sheet vinyl, begin by unrolling the sheet and positioning it in the room. Allow for extra material along the edges to facilitate trimming. Use a utility knife and a straightedge to trim the sheet vinyl to fit the room's dimensions. Apply the adhesive according to the manufacturer's instructions. Carefully lay the sheet vinyl onto the adhesive, working from one end to the other. Use a floor roller to press the vinyl firmly into the adhesive, ensuring complete contact and removing any air bubbles. Trim the edges of the vinyl along the walls, leaving a small expansion gap. Install baseboards or quarter-round molding to cover the expansion gap and provide a finished look.
For LVT and VPF, the installation process varies depending on the product. For "click-lock" flooring, simply align the edges of the planks or tiles and snap them together. For adhesive-backed LVT and VPF, peel off the backing and carefully position the plank or tile on the subfloor. Press firmly to ensure proper adhesion. For LVT and VPF that require adhesive, apply the adhesive according to the manufacturer's instructions and position the planks or tiles accordingly. Use a floor roller to ensure complete contact with the adhesive. Stagger the seams between rows of planks or tiles to create a more visually appealing and structurally sound floor.
When cutting LVT or VPF, use a utility knife and a straightedge. Score the surface of the plank or tile several times, then snap it along the score line. For more complex cuts, use a jigsaw or a vinyl flooring cutter. Always wear safety glasses and gloves when cutting vinyl flooring.
Throughout the installation process, maintain a consistent expansion gap along the walls. This allows the vinyl flooring to expand and contract with changes in temperature and humidity, preventing buckling or gapping. Use spacers to maintain the desired expansion gap while installing the flooring.
After completing the installation, allow the adhesive to cure completely before walking on the floor. Follow the manufacturer's instructions regarding curing times. Once the adhesive has cured, install baseboards or quarter-round molding to cover the expansion gap and provide a finished look. Clean the floor with a mild detergent and water. Avoid using abrasive cleaners or harsh chemicals, as these can damage the vinyl flooring.
By carefully following these steps, individuals can successfully install vinyl flooring over existing ceramic tile, creating a new and aesthetically pleasing floor without the expense and disruption of tile removal.

How To Install Ceramic Tile Over Vinyl Flooring

10 Tips For Installing Vinyl Over Tile

Should You Install Vinyl Floor Over Tile

Vinyl Tile Installation A Comprehensive Guide Gc Flooring Pros

Trafficmaster Ceramica 12 X 24 Vinyl Tile Floor Installation

How To Install Vinyl Plank Flooring As A Beginner Home Renovation

How To Lay Tile Over An Existing Vinyl Floor Today S Homeowner

Lvt Flooring Over Existing Tile The Easy Way Vinyl Floor Installation Diy

New Vinyl Plank Flooring Over Tile Table And Hearth

How To Install L And Stick Vinyl Plank Flooring The Nifty Nester
Related Posts