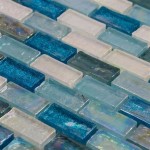
Essential Aspects of Installing Vinyl Plank Flooring on Ceramic Tile
Transforming the aesthetics and functionality of your home with vinyl plank flooring over ceramic tile requires careful planning and meticulous execution. By adhering to proper installation techniques, you can ensure a durable and visually appealing flooring solution that will enhance your living space for years to come.
1. Surface Preparation:
Thoroughly clean the ceramic tile surface to remove all dirt, dust, and debris. Employ a degreaser to eliminate any oily residues that may impair adhesion. Use a level or straightedge to assess the flatness of the surface. If necessary, level the tiles using a self-leveling compound to create a smooth and even base.
2. Underlayment Installation:
Install an underlayment layer over the ceramic tile to provide additional soundproofing and cushioning. Choose an underlayment that is compatible with vinyl plank flooring and the existing tile surface. Spread adhesive on the ceramic tile and place the underlayment securely, ensuring it is firmly pressed into the adhesive.
3. Adhesive Selection:
Opt for a high-quality adhesive specifically designed for vinyl plank flooring over ceramic tile. Water-based adhesives provide ample working time, while solvent-based adhesives offer faster curing speeds. Follow the manufacturer's instructions carefully regarding the amount and application method of the adhesive.
4. Layout Planning:
Begin by determining the direction of your vinyl plank installation. For a classic look, align the planks parallel to the longest wall in the room. Measure and mark the center point of the room and snap a chalk line to serve as a guideline for the first row.
5. Plank Installation:
Apply a thin layer of adhesive to the prepared surface. Start by laying the first plank along the chalk line, pressing it firmly into place. Continue adding planks, ensuring they are tightly interlocked and aligned. Use a tapping block and hammer to gently tap the planks together, avoiding excessive force.
6. Cutting and Fitting:
For areas that require custom cuts, measure and mark the plank using a measuring tape and square. Use a sharp utility knife or vinyl flooring cutter to cut the plank precisely. Dry-fit the cut plank to ensure it fits perfectly before applying adhesive.
7. Trim and Moldings:
Once the vinyl plank flooring is installed, add baseboards and transition moldings as needed to create a seamless and finished look. Measure and cut the trim pieces to size and secure them using nails or adhesive. Install transition strips in areas where the vinyl plank meets other flooring types, such as carpet or tile.
8. Maintenance and Care:
Regular cleaning and maintenance will ensure the longevity of your vinyl plank flooring. Use a soft brush or vacuum cleaner to remove loose dirt and debris. For deeper cleaning, use a manufacturer-recommended vinyl flooring cleaner. Avoid using abrasive cleaners or steam mops, as these can damage the surface.

New Vinyl Plank Flooring Over Tile Table And Hearth

New Vinyl Plank Flooring Over Tile Table And Hearth

Ceramic Tile Removal And Vinyl Plank Install

How To Install Luxury Vinyl Plank Over Tile Flooring

New Vinyl Plank Flooring Over Tile Table And Hearth

10 Tips For Installing Vinyl Over Tile

Lvt Flooring Over Existing Tile The Easy Way Vinyl Floor Installation Diy

Vinyl Plank Wood Directly Over Tile

New Vinyl Plank Flooring Over Tile Table And Hearth

A Complete Guide How To Stagger Vinyl Plank Flooring Whole Cabinet Supply
Related Posts