How to Install Backer Board for a Tile Shower Floor and Wall
Installing a tiled shower requires careful consideration of the substrate upon which the tiles will be laid. Traditional drywall is not suitable for wet environments and can deteriorate quickly, leading to water damage and mold growth. Backer board is a specialized material designed for wet areas, offering superior moisture resistance and longevity. This article provides a comprehensive guide to installing backer board for a tile shower floor and wall, ensuring a durable and long-lasting shower construction.
1. Prepare the Shower Area
Before installing the backer board, it's crucial to prepare the shower area properly. This involves removing any existing finishes, such as drywall or tile, and ensuring the subfloor and studs are sound.
Here's a detailed breakdown of the preparation process:
-
Remove Existing Finishes:
Carefully remove all existing tile, drywall, or other finishes from the shower area. This step may require specialized tools depending on the materials being removed. -
Inspect Subfloor and Studs:
Thoroughly inspect the subfloor and studs for any signs of rot, damage, or movement. Repair or replace any compromised areas before proceeding. -
Create a Level Base:
Ensure the subfloor is level using a level and shims. This step is crucial for a smooth tile installation. -
Install a Moisture Barrier:
Apply a waterproof membrane, such as a plastic sheet or a liquid membrane, to the subfloor and walls. This barrier will prevent water from seeping into the substrate. -
Install Waterproofing Tape:
Apply waterproof tape to all joints and seams between the subfloor and walls, ensuring a water-tight seal.
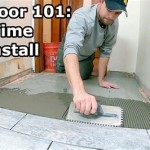
2. Installing Backer Board on the Floor
Backer board for shower floors is typically made of cement board, which is highly durable and moisture-resistant. You can choose between 1/2-inch and 1/4-inch thick boards depending on the existing subfloor thickness and desired final floor height.
Follow these steps to install backer board on the shower floor:
-
Measure and Cut:
Measure the shower floor area and cut the backer board to size using a utility knife or circular saw. It's recommended to use a circular saw with a carbide-tipped blade for clean cuts. -
Secure the Backer Board:
Attach the backer board to the subfloor using screws or nails specifically designed for cement board. Ensure the screws or nails are driven flush with the board’s surface. -
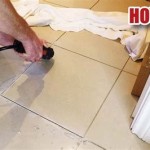
Seal Joints:
Use a waterproof sealant to seal any gaps or joints between the backer board panels. Apply the sealant generously and smooth it out with a putty knife. -
Install a Mortar Bed:
For added stability and support, a thin layer of mortar can be applied over the backer board before tiling.
3. Installing Backer Board on the Walls
Installing backer board on the shower walls is similar to the floor installation process. However, you might need to adjust the installation method depending on the wall structure and material.
Here's a step-by-step guide for wall installation:
-
Measure and Cut:
Measure the shower wall area and cut the backer board to size using a utility knife or circular saw. Remember to account for any necessary overlaps between panels. -
Secure the Backer Board:
For walls with wood studs, attach the backer board using screws or nails specifically designed for cement board. For walls with concrete or masonry, consider using construction adhesive or mechanical fasteners. -
Create a Watertight Seal:
Seal the joints and seams between the backer board panels using a waterproof sealant. Apply the sealant generously and smooth it out with a putty knife. -
Install Corner Beads:
Use corner beads to protect and reinforce the corners of the shower. Apply a layer of thinset mortar to the corner bead and press it firmly against the backer board.
After installing the backer board, allow the sealant to cure completely before proceeding with the next step of tiling. Remember to wear appropriate safety gear, such as gloves, safety glasses, and a dust mask, during the installation process.

How To Install Cement Board For Tile Bower Power

How To Install Cement Board For Tile Projects Diy Family Handyman

How To Install Shower Backerboard Hardieboard Cement Proper Installation Diy

Here S How Install A New Shower Stall With Tile Floor

How To Install Cement Board For Tile Bower Power

The Best Way To Waterproof Your Shower Before Tiling Inspired Hive

Proper Way To Set Wallboard For Shower

Installing Cement Board In The Bathroom Angie S Roost

Tile Backerboard Material Options Fine Homebuilding

How To Install And Waterproof A Walk In Shower Megan S Moments
Related Posts