Can You Use Tile Backer Board in Outside Corners on Shower Walls?
When constructing a shower, careful attention must be paid to the corners, as these are areas prone to moisture buildup and potential leaks. While tile backer board is a popular choice for shower walls due to its water-resistant properties, its use in outside corners is a topic that often sparks debate among DIY enthusiasts and professionals alike. This article explores the pros and cons of using tile backer board in outside corners of shower walls, providing guidance for making informed decisions during the construction process.
Understanding the Importance of Outside Corners in Shower Construction
Outside corners in showers are particularly vulnerable to water damage. The constant exposure to moisture, coupled with the inherent weakness of a 90-degree angle, can lead to cracking, water penetration, and ultimately, mold growth. Traditionally, these corners are reinforced using various methods to prevent water ingress and maintain the integrity of the shower structure. While tile backer board can be a valuable component in shower construction, its effectiveness in outside corners requires careful consideration and proper installation techniques.
Pros and Cons of Using Tile Backer Board in Outside Corners
Pros
- Water Resistance: Tile backer board is designed to be water-resistant, making it a suitable material for shower applications. Its composition helps prevent water absorption and minimizes the risk of damage from moisture.
- Strength and Durability: Tile backer board is stronger and more durable than traditional drywall, able to withstand the stresses of tile installation and daily use. This enhances the overall longevity of the shower.
- Ease of Installation: Tile backer board can be cut and installed relatively easily, making it a convenient material for DIY projects. Its ability to be adhered to various surfaces simplifies the construction process.
- Smooth Finish: Tile backer board offers a smooth surface that provides a suitable base for tile installation, ensuring a professional and aesthetically pleasing finish.
Cons
- Potential for Cracking: While tile backer board offers strength, its rigidity can make it prone to cracking in outside corners, especially if not properly reinforced. The abrupt change in direction at the corner creates stress points that can cause the material to fracture over time.
- Limited Flexibility: Tile backer board is not as flexible as some other materials, which can make it difficult to achieve a smooth and seamless finish in outside corners, especially if the walls are not perfectly straight.
- Increased Labor: Properly reinforcing tile backer board in outside corners requires additional time and effort, involving the use of specialized tools and techniques. This may increase the overall cost and labor involved in the project.
Alternative Methods for Reinforcing Outside Corners
While using tile backer board in outside corners is a viable option, it's essential to consider alternative methods that offer superior protection and minimize potential issues. These include:
- Corner Bead: Metal corner bead is specifically designed for reinforcing inside and outside corners. It offers excellent protection against water ingress and provides a smooth surface for finishing.
- Waterproof Tape: Applying waterproof tape to the corner before installing the backer board can further enhance water resistance and prevent moisture from penetrating the wall.
- Shower Pan Liner: A shower pan liner, extending beyond the shower pan itself and covering the walls, provides a complete water barrier, preventing moisture from reaching the wall structure.
By employing these alternative methods, homeowners can ensure the longevity and integrity of their shower, minimizing the risk of leaks, cracking, and mold growth.
In conclusion, while tile backer board can be a valuable component in shower construction, its use in outside corners requires careful consideration and appropriate reinforcement. Alternative methods like corner bead and waterproof tape offer superior protection and minimize the risk of potential issues. By understanding the pros and cons of various options and employing the most suitable approach, homeowners can create a durable and aesthetically pleasing shower that will stand the test of time.

Drywall To Backerboard Transition In Tiled Showers The Floor Elf

Tile Layout Tip For Outside Corners

Drywall To Backerboard Transition In Tiled Showers The Floor Elf

Www Diytileguy Com Wp Content Uploads 2024 01 Mesh

Redblockindustries Com Wp Content Uploads 2024 01

Tiling Against A Corner Doityourself Com Community Forums

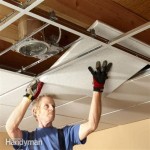
How To Install Cement Board For Tile Projects Diy Family Handyman
Qph Cf2 Quoracdn Net Main Qimg 421f272a1ae18c5c68f
How To Make Outside Corner Transition From Kerdi Membrane Sheetrock Ceramic Tile Advice Forums John Bridge

How To Tap Cement Board Outside Corner Using Alkali Mesh Shower Remodeling
Related Posts

