Can You Put Ceramic Tile Over Concrete Outside?
Laying ceramic tile over an exterior concrete surface is a popular choice for patios, walkways, and other outdoor areas. While it offers an aesthetically pleasing and durable finish, several factors must be considered before undertaking this project. Proper preparation and installation are crucial for a successful and long-lasting tiled surface that withstands the elements.
Concrete Surface Preparation
The existing concrete surface must be thoroughly cleaned and free of any debris, dirt, oil, or previous coatings. Pressure washing is often the most effective method for achieving a clean surface. Any cracks or imperfections in the concrete should be repaired using a suitable concrete patching compound. The concrete should also be level. Significant unevenness may require a leveling compound to create a smooth, stable base for the tile.
Climate Considerations
Outdoor tile installations are exposed to fluctuating temperatures and weather conditions. Freeze-thaw cycles can cause significant stress on the tile and adhesive, potentially leading to cracking and detachment. Choosing appropriate tile and adhesive rated for exterior use and extreme temperatures is essential. Porcelain tile is generally preferred over ceramic tile for outdoor applications due to its lower water absorption rate and increased durability. The local climate should be a primary factor in material selection.
Drainage and Moisture
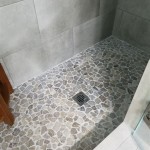
Proper drainage is critical for preventing water accumulation beneath the tile, which can contribute to damage in freezing conditions. The concrete slab should have a slight slope to facilitate water runoff. A waterproof membrane should be installed between the concrete and the tile mortar to prevent moisture from seeping up into the tile. This membrane adds an additional layer of protection and helps to prevent efflorescence, a whitish deposit that can appear on the tile surface due to moisture migration.
Choosing the Right Adhesive
Selecting the appropriate adhesive, also known as thin-set mortar, is crucial for a successful outdoor tile installation. A high-quality, exterior-grade thin-set mortar specifically designed for use with porcelain tile is recommended. Modified thin-set mortars offer improved bonding strength, flexibility, and water resistance, making them suitable for demanding outdoor environments. The manufacturer's instructions should be followed carefully for proper mixing and application.
Tile Installation Techniques
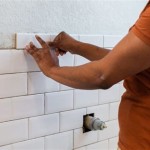
Proper tile installation techniques are crucial for a durable and long-lasting finish. Using the appropriate sized trowel is essential for ensuring adequate mortar coverage on the back of the tile. Back buttering, the process of applying a thin layer of mortar to the back of each tile, can further improve adhesion and prevent voids beneath the tile. Consistent spacing between tiles using spacers allows for expansion and contraction due to temperature changes.
Grouting and Sealing
After the tile adhesive has cured, the joints between the tiles should be filled with a suitable grout. An exterior-grade, polymer-modified grout offers enhanced durability and water resistance. Properly filling the grout joints prevents water penetration and ensures a finished look. Once the grout has cured, applying a sealant to the grout and tile surface provides additional protection against staining and moisture absorption.
Maintenance and Longevity
Regular cleaning and maintenance are necessary to preserve the appearance and longevity of the outdoor tile installation. Sweeping or rinsing the surface regularly removes dirt and debris. Periodically cleaning the tile with a suitable tile cleaner helps prevent the buildup of grime and stains. Inspecting the grout lines regularly for cracks or damage and re-sealing as needed helps maintain the integrity of the installation and prevents water infiltration.
Expansion Joints
Incorporating expansion joints into the tile installation is crucial, especially for larger areas. Expansion joints are gaps in the tile and grout that allow for movement due to temperature fluctuations and prevent cracking. These joints should be strategically placed around the perimeter of the tiled area and at intervals across the surface, typically every 8 to 12 feet. They are then filled with a flexible sealant that allows for movement while preventing water penetration.
Substrate Evaluation
Before beginning any tile installation project on an exterior concrete surface, a thorough evaluation of the substrate is essential. This assessment should include checking for any signs of structural issues, such as cracks, settlement, or spalling. Addressing these problems before tiling is crucial, as they can compromise the integrity of the finished surface. If the concrete slab is unstable or significantly damaged, professional consultation may be necessary to determine the best course of action.

Concrete Patio Transformation 7 Steps To Diy A New Outdoor Oasis

Concrete Patio Transformation 7 Steps To Diy A New Outdoor Oasis

Concrete Patio Transformation 7 Steps To Diy A New Outdoor Oasis

Tiling Over A Ed Concrete Slab Fine Homebuilding
:max_bytes(150000):strip_icc()/can-you-install-tile-directly-on-concrete-1822600-04-458f7bb6c78348c1835cf8054ef36553.jpg?strip=all "How To Install Tile Over Concrete")
How To Install Tile Over Concrete

Tile Over Concrete On Outdoor Patio Need Advice Ceramic Forums John Bridge

Porcelain Tile Ontop Of Cemente Patio Ceramic Advice Forums John Bridge

Concrete Patio Transformation 7 Steps To Diy A New Outdoor Oasis

The Complete Guide To Choosing Best Outdoor Tile

What To Use Outdoors Porcelain Tiles Or Ceramic Trini Tile
Related Posts