Can You Tile Onto Breeze Blocks?
Breeze blocks, also known as concrete masonry units (CMUs) or cinder blocks, are a common building material, often used for walls, fences, and other structures. Their distinctive patterned open structure provides ventilation and a unique aesthetic. While their raw appearance can be appealing, many homeowners and builders consider tiling over breeze blocks for a smoother, more refined finish. This raises the question: can you effectively tile onto breeze blocks?
The short answer is yes, tiling onto breeze blocks is possible. However, it requires careful preparation and the right materials to ensure a successful, long-lasting result. The porous nature of breeze blocks presents specific challenges that must be addressed before tiling can begin. Ignoring these challenges can lead to adhesion issues, moisture problems, and ultimately, a failed tiling project.
One of the primary concerns when tiling onto breeze blocks is their high absorption rate. Breeze blocks readily absorb moisture, which can affect the curing process of tile adhesive and potentially weaken the bond over time. This absorption also increases the risk of efflorescence, a white, powdery deposit that can appear on the surface of the tile due to salts leaching out from the blocks.
To mitigate these issues, proper surface preparation is crucial. The first step is to thoroughly clean the breeze block surface. This involves removing any loose debris, dirt, or existing paint using a wire brush, scraper, or pressure washer. Any efflorescence should also be removed using a specialized efflorescence cleaner.
Once the surface is clean and dry, a primer specifically designed for porous surfaces should be applied. This primer acts as a barrier, reducing the absorption rate of the breeze blocks and creating a more stable surface for the tile adhesive to bond to. It's essential to choose a high-quality primer suitable for exterior applications if the breeze blocks are exposed to the elements.
After the primer has dried completely, the next step is to choose the appropriate tile adhesive. A modified thin-set mortar designed for use on concrete and masonry surfaces is generally recommended. It's crucial to select an adhesive with excellent bonding strength and flexibility to accommodate any movement or expansion of the breeze blocks.
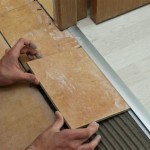
When applying the tile adhesive, a notched trowel is used to create ridges that ensure proper coverage and allow for air to escape. The tiles are then firmly pressed into the adhesive, ensuring full contact and a level surface. Spacers are used to maintain consistent grout lines.
Choosing the right type of tile is also important for a successful installation. Porcelain tiles are generally preferred due to their durability and low water absorption rate. Ceramic tiles can also be used, but it's crucial to select a denser, less porous variety.
Once the tile adhesive has cured, the final step is to apply grout. Grout fills the spaces between the tiles, providing a waterproof seal and enhancing the overall aesthetic. A sanded grout is typically recommended for wider grout lines, while unsanded grout is suitable for narrower lines. After the grout has dried, a sealant can be applied to further protect the tiles and grout from moisture and staining.
Tiling onto breeze blocks can be a more complex process than tiling onto other surfaces due to the specific challenges posed by the porous nature of the blocks. However, with proper surface preparation, the right materials, and careful attention to detail, a successful and long-lasting tile installation is achievable.
While the steps outlined above provide a general guide, it's always recommended to consult with a qualified tiling professional for specific advice and recommendations based on the individual project and the specific type of breeze blocks being used. They can assess the condition of the blocks, recommend appropriate materials, and ensure the installation is carried out correctly.
Different types of breeze blocks may require slightly different approaches. For example, lightweight aggregate breeze blocks might require a different primer or adhesive than denser, solid concrete blocks. Additionally, the location of the breeze blocks, whether interior or exterior, will influence the choice of materials and the necessary preparation steps.
Considering the long-term investment involved in tiling, seeking professional guidance is a prudent step. A professional tiler can provide valuable insights and ensure the project is completed to a high standard, minimizing the risk of future problems. They can also address any unforeseen issues that might arise during the installation process.
Ultimately, the success of tiling onto breeze blocks depends on thorough preparation, the use of appropriate materials, and meticulous attention to detail. By addressing the specific challenges posed by these porous building materials, a durable and aesthetically pleasing tiled surface can be achieved.

Tile Over Blockwork Mike Haduck

Painting Breeze Blocks What Next Page 1 Homes Gardens And Diy Pistonheads

How To Prepare Uneven Walls And Floors Tile

External Breeze Block Wall Board Or Plaster Diynot Forums

Everything You Need To Know About Breeze Blocks Clay Imports

Breeze Blocks Are Back Your Newest Diy Project Hardware Concepts

Dreamin Breeze Block House Architectureau

Breeze Block 75 Designs From 30 Companies Jan 2024 Update

How To Bond Plasterboard Breeze Block Ehow

North Yorks Open Studios Lizzie Shepherd On Landscape
Related Posts