Laying Tile on a Concrete Slab
Laying tile directly onto a concrete slab offers a durable and attractive flooring solution. However, proper preparation and execution are crucial for a successful installation. This article provides a comprehensive guide for laying tile on a concrete slab.
Assessing the Concrete Slab
Before beginning the tiling process, the concrete slab must be thoroughly assessed to ensure its suitability for tile installation. This involves checking for several key factors:
1. Moisture: Excessive moisture can cause adhesive failure and tile damage. A moisture test should be conducted to determine the moisture content of the slab. Various methods exist, including calcium chloride tests and relative humidity probes. 2. Cracks: Existing cracks should be repaired to prevent them from transferring to the tile surface. Appropriate crack isolation membranes or patching compounds should be used. 3. Levelness: An uneven slab can lead to lippage and an unstable tile surface. Leveling compounds can be used to correct minor imperfections. Significant unevenness may require more extensive remediation. 4. Cleanliness: The slab must be free of dirt, debris, oil, and other contaminants that can interfere with adhesive bonding. Thorough cleaning with appropriate cleaning agents is essential. 5. Sealers: Existing sealers may need to be removed or etched to ensure proper adhesion of the tile adhesive. Compatibility between the existing sealer and the chosen adhesive should be verified. 6. Age: Newly poured concrete slabs require a curing period before tile can be installed. The required curing time depends on the concrete mix and environmental conditions. 7. Structural Integrity: The slab must be structurally sound to support the weight of the tile and any anticipated loads. Any structural issues should be addressed before proceeding with tile installation.
Preparing the Concrete Slab
Once the slab assessment is complete, the preparation phase begins. Proper preparation ensures a smooth and successful tile installation.
1. Cleaning: Thoroughly clean the slab using a suitable cleaning agent to remove dirt, dust, grease, and other contaminants. A degreaser may be necessary for oil or grease stains. 2. Repairing Cracks: Repair any cracks using an appropriate patching compound or crack isolation membrane. Follow the manufacturer’s instructions for proper application and drying time. 3. Leveling: Apply a leveling compound to address any unevenness in the slab. Ensure the leveling compound is suitable for the specific tile being installed. 4. Priming: Applying a primer can enhance adhesion and improve the bond between the tile adhesive and the concrete slab. Select a primer recommended for use with the chosen tile adhesive. 5. Planning the Layout: Before laying any tile, carefully plan the layout to minimize cuts and create a visually appealing pattern. Dry-laying tiles can help visualize the final result and identify any potential layout challenges.
Installing the Tile
With the slab prepared, the tile installation process can begin. Careful attention to detail during this stage is critical for achieving a professional finish.
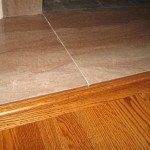
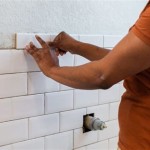
1. Choosing the Right Adhesive: Select a tile adhesive appropriate for the specific type of tile and the environment. Consider factors such as moisture exposure, temperature fluctuations, and the size and weight of the tiles. 2. Applying the Adhesive: Apply the adhesive to the concrete slab using a notched trowel. The size and depth of the notches will depend on the size and type of tile being installed. 3. Laying the Tile: Place the tiles firmly into the adhesive, ensuring proper spacing and alignment. Use spacers to maintain consistent grout lines. 4. Back-Buttering (if necessary): For larger tiles, back-buttering may be required to ensure full contact with the adhesive. This involves applying a thin layer of adhesive to the back of the tile before placing it on the slab. 5. Leveling and Adjusting: Use a level to ensure the tiles are even and adjust as necessary. Tap the tiles gently with a rubber mallet to embed them fully into the adhesive. 6. Cleaning Excess Adhesive: Remove any excess adhesive from the tile surface and grout lines before it dries. Use a damp sponge or cloth for cleaning.
Grouting and Sealing
Grouting and sealing are the final steps in the tile installation process. These steps protect the installation and provide a finished look.
1. Mixing the Grout: Mix the grout according to the manufacturer's instructions. Ensure the consistency is appropriate for the grout lines and the type of tile. 2. Applying the Grout: Apply the grout to the grout lines using a grout float, working it diagonally into the joints. Remove excess grout from the tile surface with a damp sponge. 3. Cleaning the Tile: After the grout has partially cured, clean the tile surface thoroughly to remove any grout haze. Use a clean, damp sponge or cloth. 4. Sealing the Grout (if necessary): Sealing the grout helps protect it from staining and moisture penetration. Apply a grout sealer according to the manufacturer's instructions. 5. Curing Time: Allow the grout and sealer to cure fully before subjecting the tiled surface to heavy traffic or moisture. Follow the manufacturer’s recommendations for curing times.
By following these guidelines and paying close attention to detail, a successful and long-lasting tile installation on a concrete slab can be achieved.

How To Lay Tile Over A Concrete Slab Fine Homebuilding
:max_bytes(150000):strip_icc()/can-you-install-tile-directly-on-concrete-1822600-04-458f7bb6c78348c1835cf8054ef36553.jpg?strip=all "How To Install Tile Over Concrete")
How To Install Tile Over Concrete

How To Lay Tile On Concrete With Pictures Wikihow

How To Tile Onto Concrete Floors Porcelain Super

How To Lay Floor Tiles On Concrete Welcome The Rubi Tools Blog

How To Lay Floor Tiles On Concrete Stonesuper

How To Install Ceramic Tiles On Concrete Floor Tile Installation

Sound Dampening Ceramic Tile Over A Concrete Floor Fine Homebuilding

How To Prepare For Laying Tile Over A Concrete Floor Ceramic Lay Tiles

How To Install Ceramic Tile Over A Concrete Slab Home Love Construction Diy
Related Posts